I first became connected with my cooking soul while living in Japan. A love for onigiri and those crispy little ice cream sandwiches they sell in the vending machines are just two things I’ve carried forward from my five years of life there. A deep respect for the tradition of “oosouji” is another.
In Japan, it’s believed that carrying any old baggage from the previous year — whether it’s actual clutter, unfinished business or damaging thoughts — into the new year is bad luck. Neatness, for the Japanese, is not just associated with the aesthetics of physical health; it’s also associated with spirituality, safety and well-being.
As a chef, there is no other philosophy I subscribe to so highly. To cook and eat well, I require a clean, organized space, so I practice oosouji — or the big cleaning — to get things off on the right foot. I clean and organize my kitchen space from top to bottom, getting rid of what no longer serves me, tidying up what I still value and setting the space for the cooking year to come.
Whether you’re recovering from cooking fatigue or looking forward to starting a whole new healthy cooking regimen in the New Year, a clean, organized kitchen is key. Set aside a weekend to tackle these five steps for cleaning out the old and getting ready for the new in your fridge, freezer and pantry — and look forward to a clean and connected year in your kitchen, too.
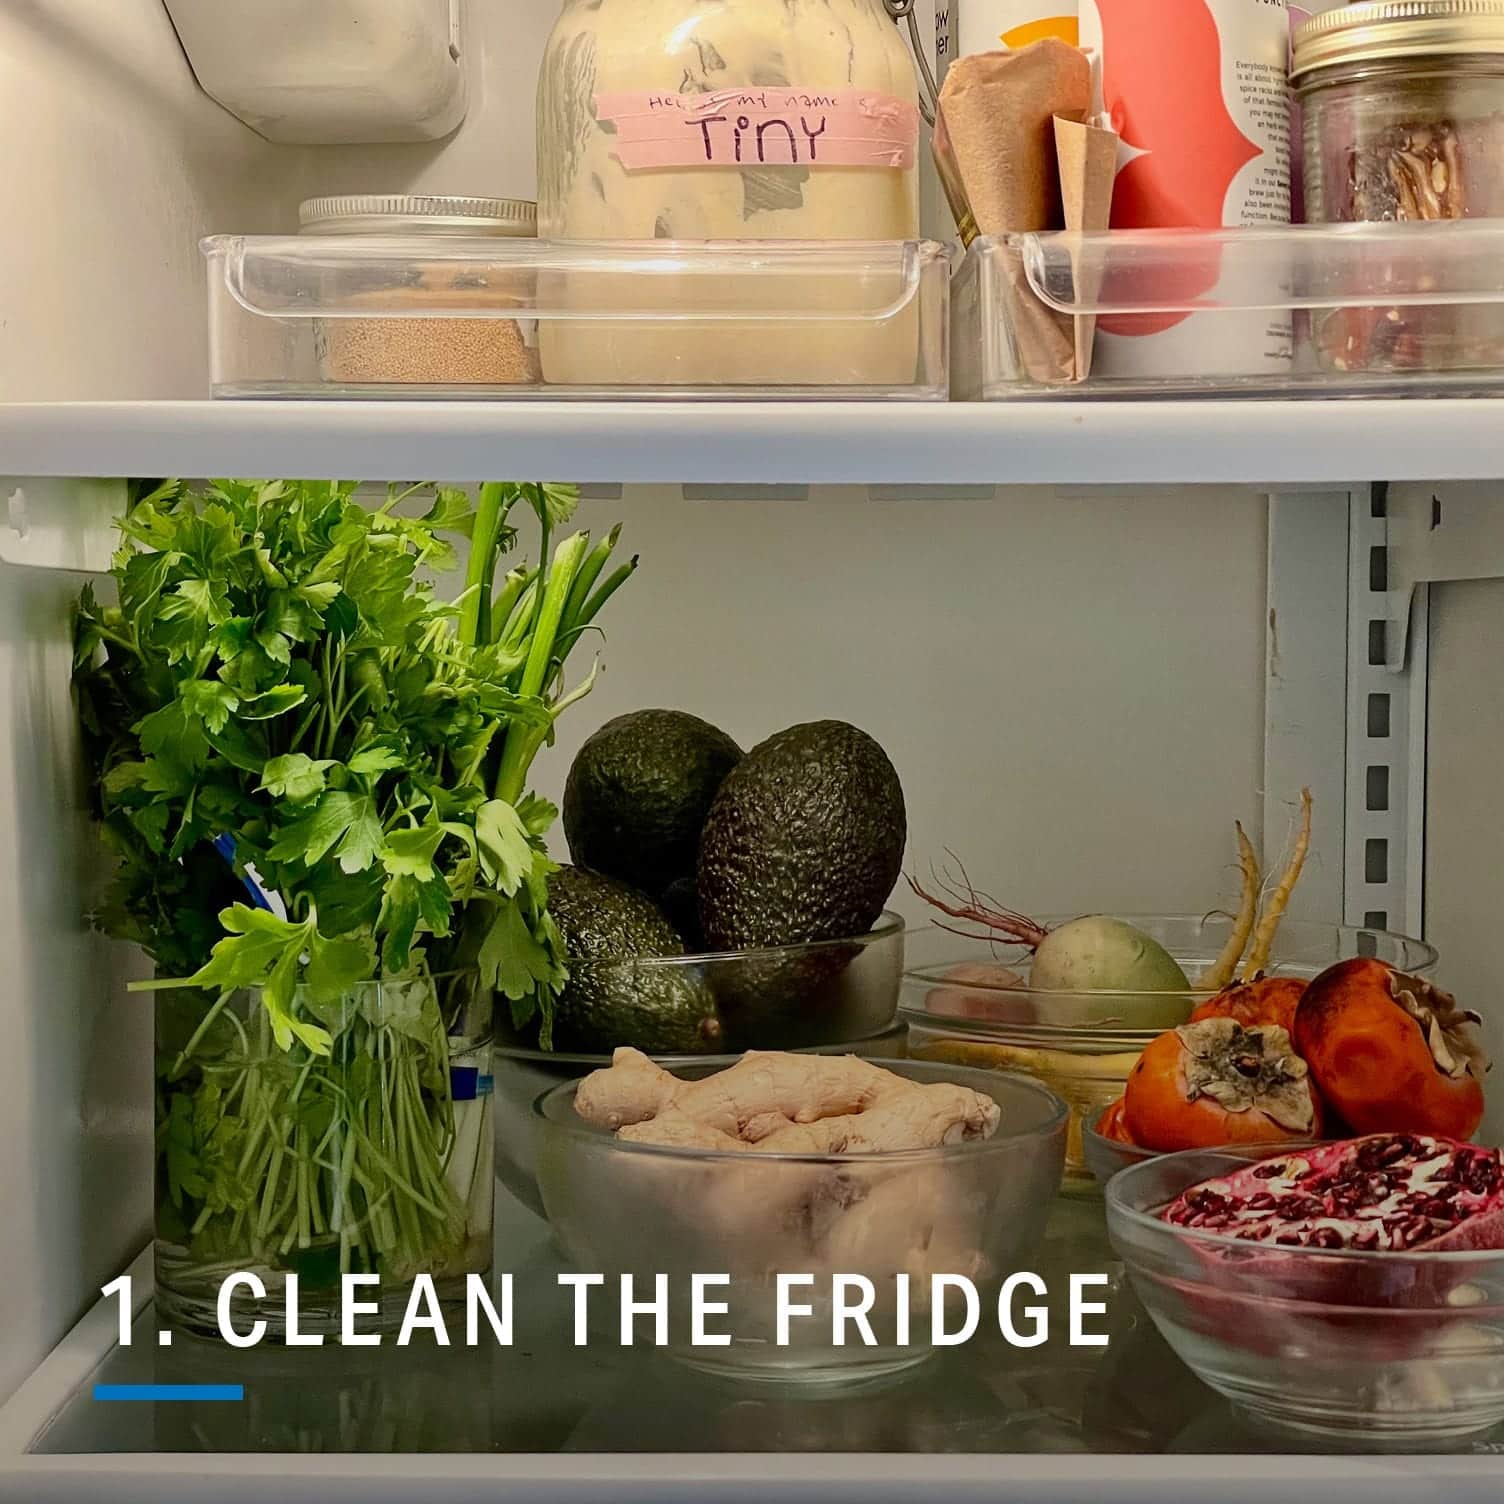
Clear your schedule for a couple of hours and clean out the fridge. I mean everything. This is easier when you set aside a staging area, then take everything out, wipe down shelves, walls, drawers and doors, too. I use an anti-bacterial spray cleaner and sometimes even toothpicks to chisel out any old grime. Then, I take a peek at the items I removed. Anything wilting and past its due date gets composted or tossed. I consider all my condiment jars, too; anything that hasn’t been touched in the past three months is discarded as well as anything that’s unidentified. Then, I wipe down all the items that are staying.
Once the fridge is clean, it’s time to put everything back in and turn that chilly blank box into an oasis for delicious ingredients. A few tips I use to keep my fridge looking supreme, feeling pristine and keeping all of my beautiful ingredients in excellent condition:
- Bag produce properly: I store produce in muslin bags to protect it and keep longer. Greens get their own bags, as do root vegetables, fruits and other items. Fresh herbs should be stored in water, just like the budding plants they are. If you’re prepping vegetables ahead of time, know that storing carrots and radishes in water helps them keep longer.
- Keep it clear: I like to use glass bowls to keep all of my vegetables accessible and visible.
- Label, label, label: Use clear glass jars or storage containers to keep leftovers and other ingredients. Label everything with a name and a date and keep labeling tape and a marker pinned to the fridge to keep the practice going.
- Commit to the practice: Once everything is clean and in its place, I pencil in 20 minutes each week to wipe out and clean the fridge of mystery items. It’s totally self-care in the best form.
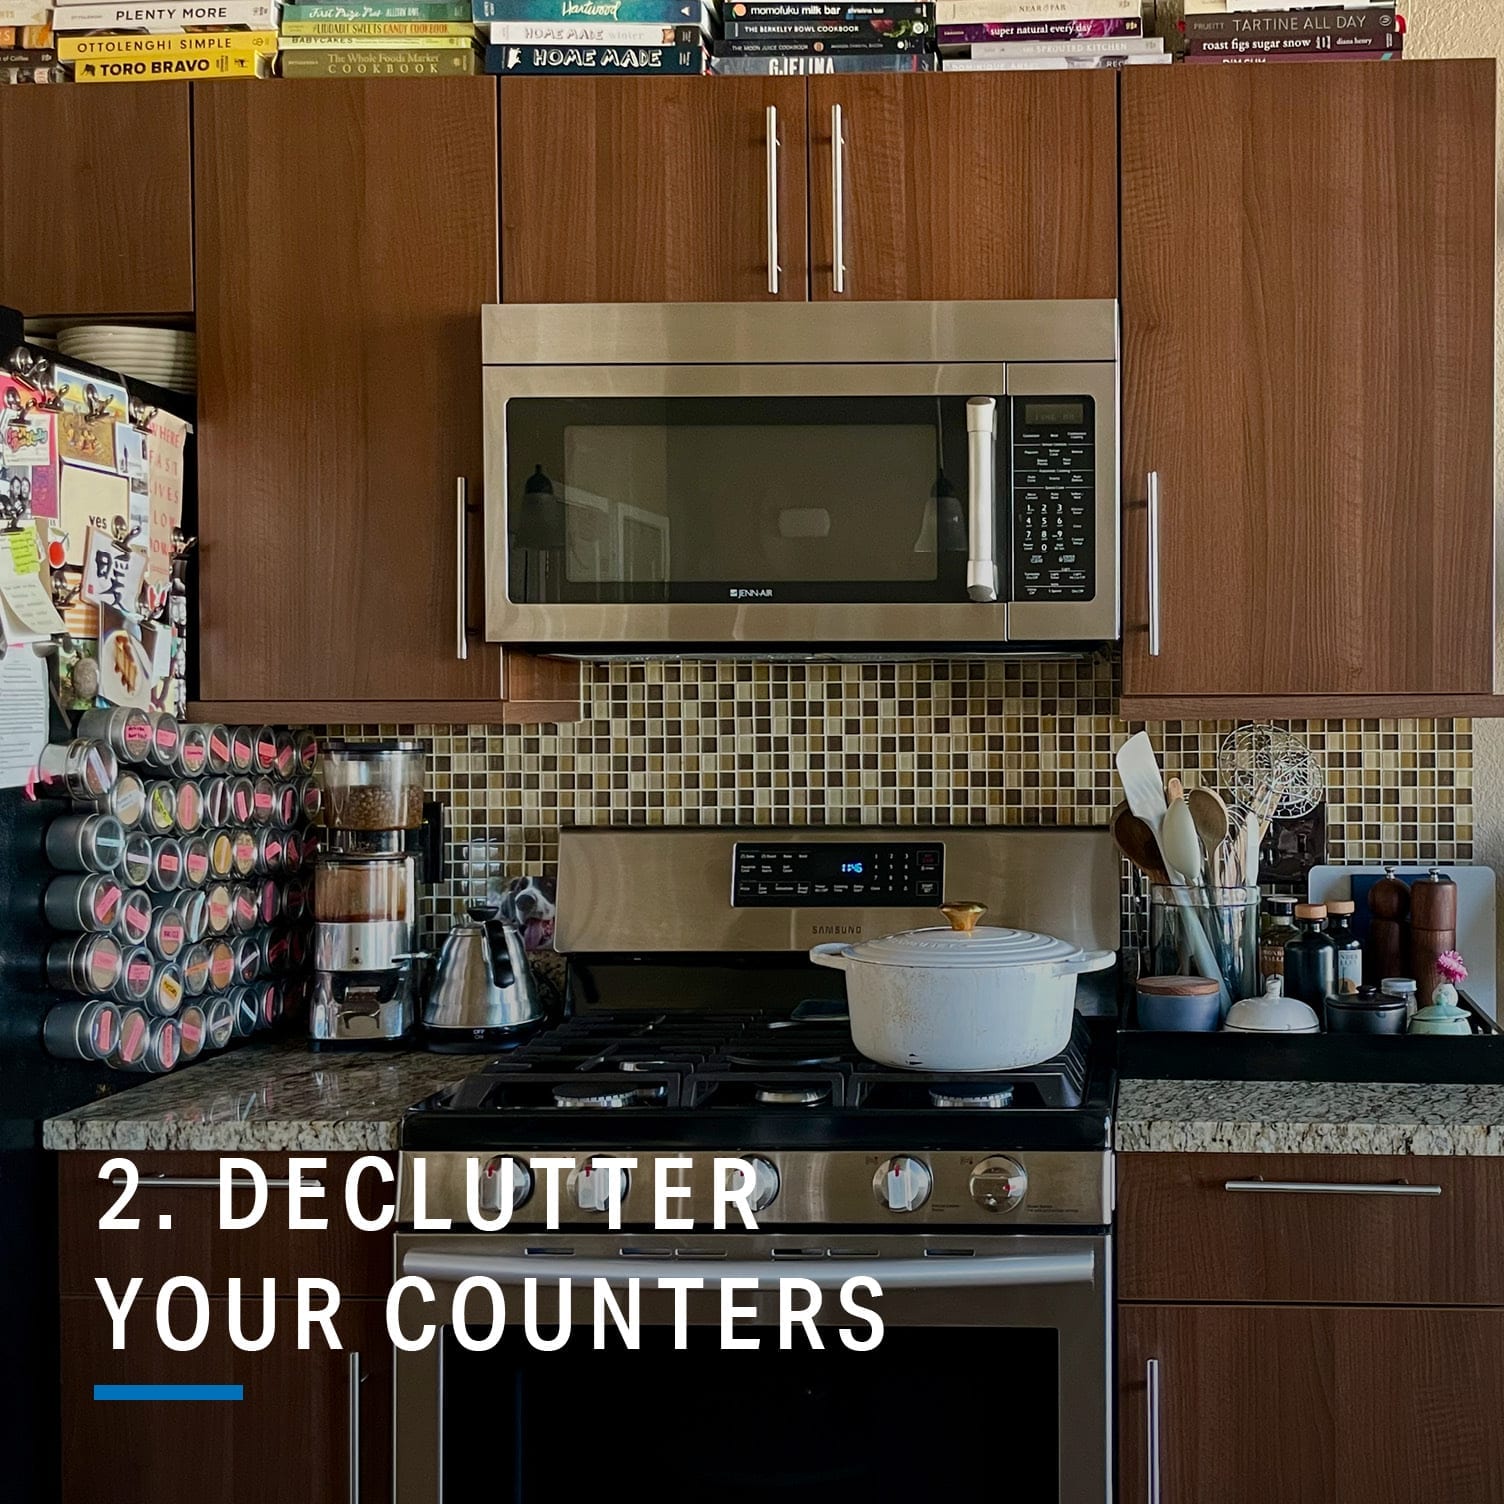
They say your desk is a mirror into your mind. I’ll argue, your kitchen counters are, too. Cluttered countertops mean mealtimes will be cluttered and chaotic, so clean the small appliances, spices, fruit bowls, canisters and other collectibles and clear your brain and your space for delicious creations. My kitchen is small, so for me, this means considering the items I use often and those that are simply an accumulation. To cook well and achieve your eating and wellness goals, create a space ready to achieve them.
- Clear everything off and clean the counters: Like what you did in the fridge, create a staging space, and remove everything on your countertop. Wipe the counters clean and look at the space. Doesn’t that feel nice? Now, start putting everything back strategically.
- Create a flavor station: A great shortcut to making delicious food is placing all of your favorite flavor agents in a place near your cooking space (instead of hiding them in a cabinet). I use a little tray to hold my favorite olive oils, spices, salt, pepper and frequently used cooking tools, so they’re never far away. A small sheet pan does the trick.
- Organize your produce: Find a pretty bowl for any produce that doesn’t need to be (or shouldn’t be) kept in the fridge. For me, this is citrus fruits, ripening avocados, apples, pears, etc. Pick a bowl that fits your space, pick a place where it’s out of the way, and vow not to overfill it.
- Consider appliances: Gadgets and small appliances can accumulate quickly. If you’ve used it within the year, keep it. If you have a recipe for something you can’t wait to cook that requires a tool or device, hang onto that tool. If not, set up a box for donation. Chances are, if you’re not excited about it in this very exciting kitchen moment, you won’t be later either.
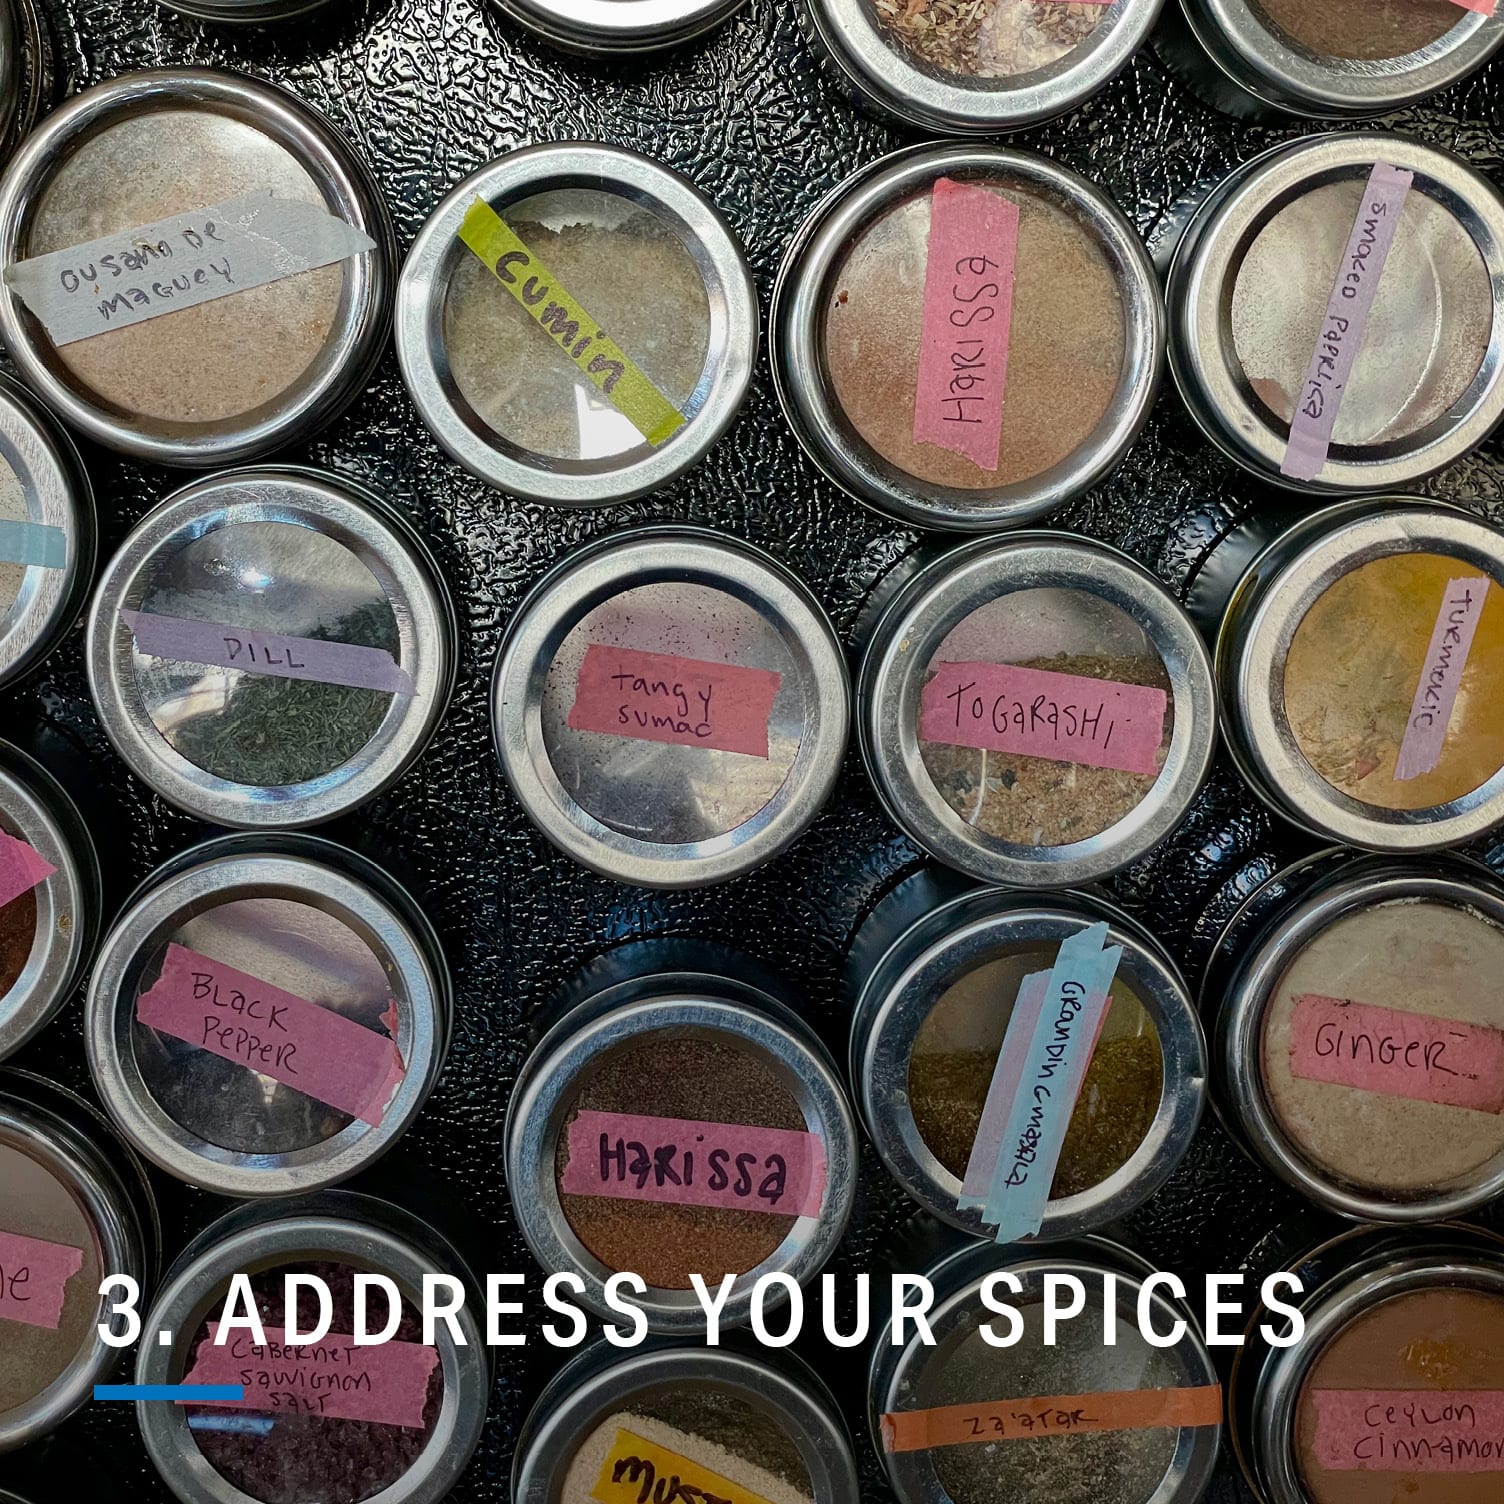
If the spice drawer is your least frequented place in the kitchen, this is the year to change that. Tons of tiny, unevenly-sized jars is enough to trash any kitchen organization plan, so commit to investing in a few matching jars or canisters. I love to use magnetic jars stuck to my fridge to store my favorite spices and always keep them labeled. Once you have a convenient place for your spices, it’s time to organize them. A few ways to keep your spices flavorful this year:
- Don’t lose power: Ground spices lose their potency within three months, so if you have ground spices that have been lurking for more than a year without much use, now is the time to toss or compost them.
- Buy small: Shop for spices in the bulk section instead of the spice aisle. This helps prevent waste by reducing the chances your spices will go bad.
- Daily grind: Grinding your whole spices is a lovely way to perk up your meals, plus it’s easy and cathartic, too. Whole spices are typically inexpensive, so invest in a small mortar and pestle or spice grinder and grind them yourself as you cook.
- Pick your winners: Buy high-quality versions of the spices you use most often and consider these your all-stars. Mine are flaky sea salt, black peppercorns, cumin, coriander, curry powder, fennel seed, cardamom and cinnamon. I also keep star anise, whole nutmeg and cloves on hand.
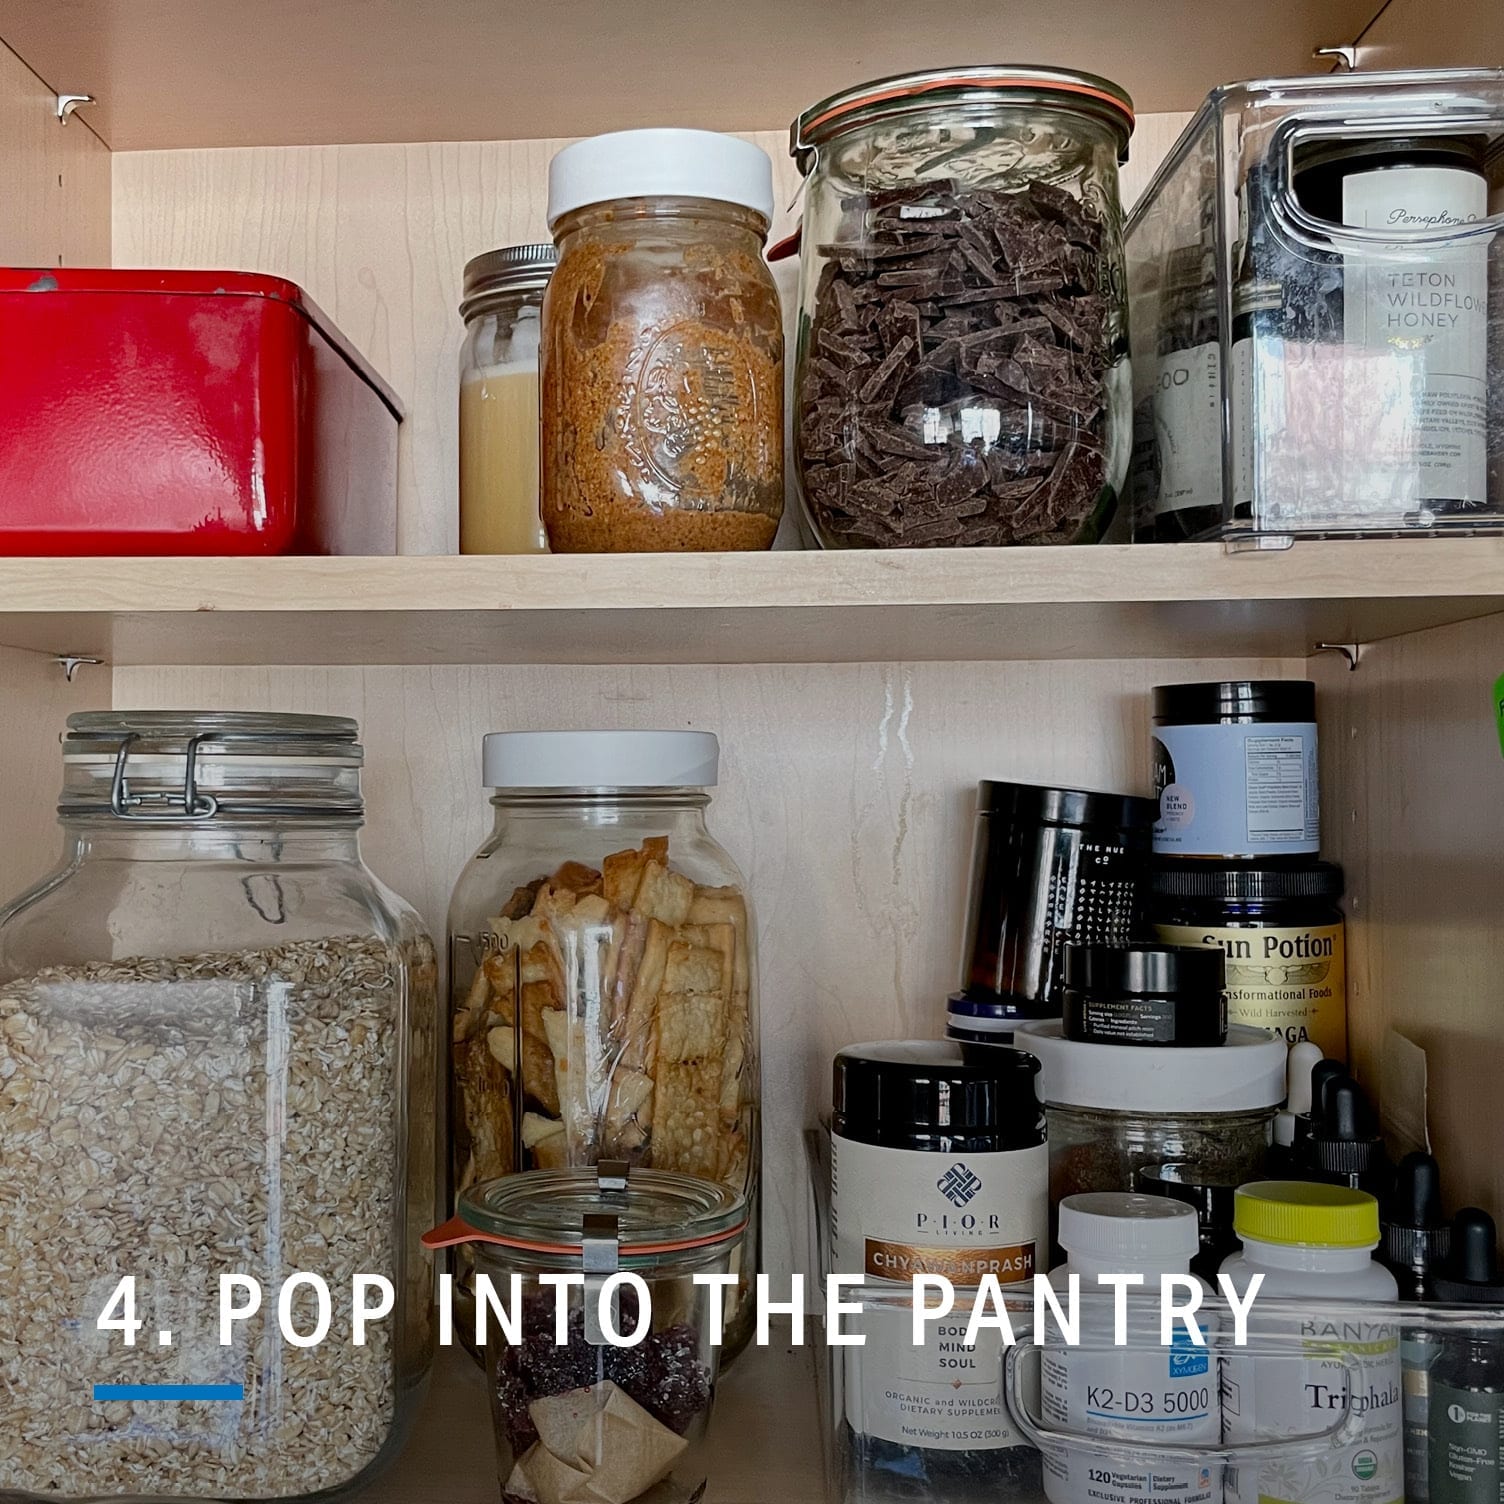
If your pantry feels like a bottomless hole of jumble, you’re not alone. The usual scenario is all sorts of plastic bags and boxes, some open, some closed, in a difficult-to-decipher pile. Few things stack or seal, and this is what we call a “cabinet of chaos.” Treat your pantry as you did the fridge and counters and clean everything out. Sweep the floors and drawers, then take inventory of the contents. Toss out any ragged bags or items that are more than a year old. Then, give yourself the gift of aesthetically pleasing pantry containers. Doing so gives a layer of respect to anything you cook. Instead of unwrapping a flimsy plastic bag, you’ll be scooping from a sophisticated glass jar to make a homey pasta or a cozy bean soup. A few other tricks to keep you in pantry bliss:
- Follow your own rules: I have stocked my pantry cabinets with clear glass jars that fit neatly in the space I have. However many jars fit in my pantry is the number of pantry ingredients I’m able to keep on hand. I dedicate one container each to crackers, snacks, beans, grains, pasta, nuts, seeds, and any other staples. Whenever I bring something home, I empty the box or bag and put it into its appropriate jars. When the jars are empty, I refill them with the same product or a suitable alternative. For example, sometimes the bean jar contains black beans, sometimes corona beans, other times pinto beans. If the jars are full, I don’t restock. This strategy prevents a pantry overflow and helps me be more creative in my cooking.
- Make a chocolate box: Yep. I have a little box in my pantry specifically dedicated to open chocolate bars. I can see inside, and when the box is full I don’t buy more chocolate. Plus, it keeps the bars nicer for munching on.
- Consolidate, consolidate: Consolidation is a massive rule in commercial kitchens, and I still adhere to it home. I keep a little army of smaller glass jars of various sizes on hand to keep small quantities of pantry items. I’m constantly putting things into jars that fit its appropriate quantity. It sounds crazy, but it feels so good and is the best way for me to know what I have on hand.
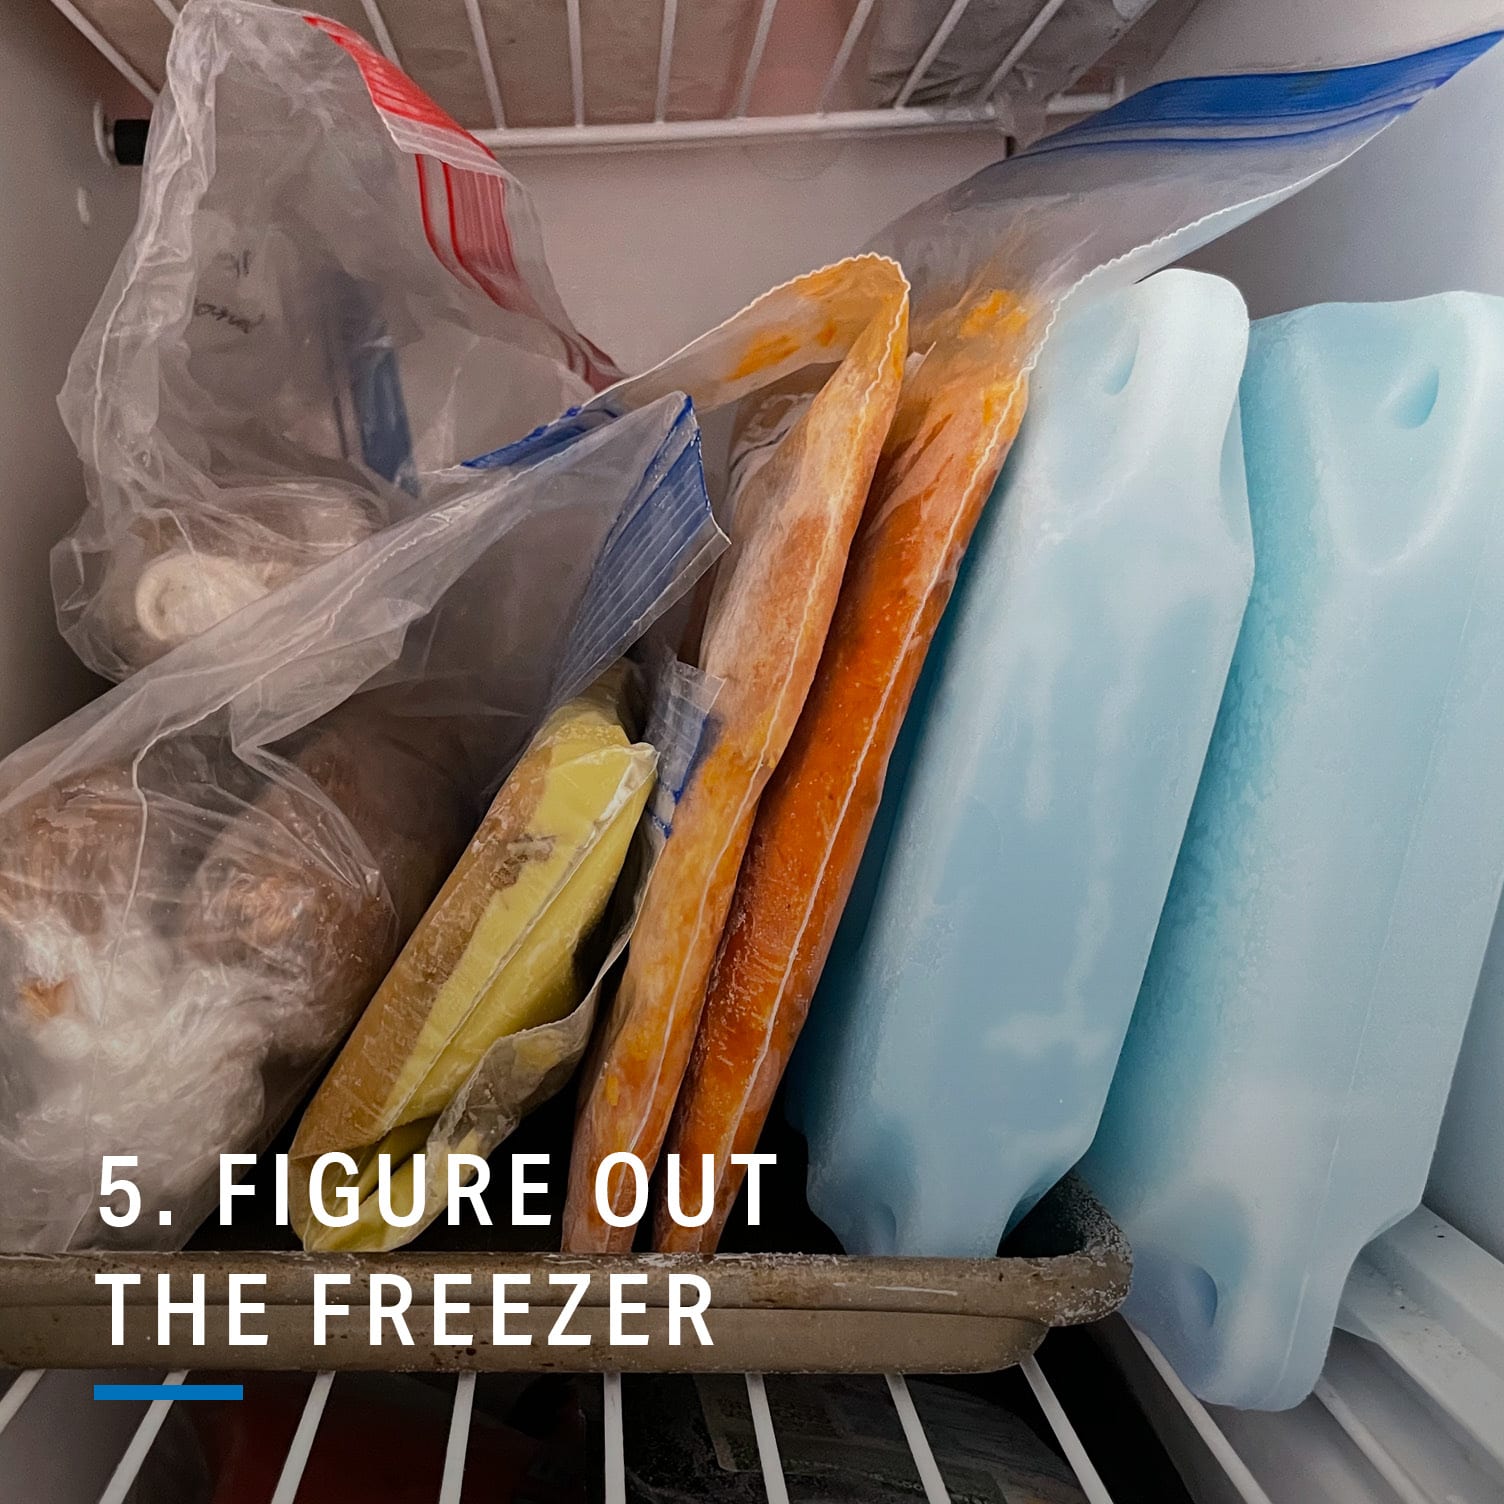
We saved the most adventurous project for last! Oddly, the freezer is our best friend — especially in pandemic times when we want to eat fresh and healthy but don’t want to go to the store every day. Similar to the fridge and pantry, you’re going to clear everything out of the freezer, clean the walls, doors and drawers and then organize the contents. You’re likely to find some gems here. Discard anything unidentified or anything that’s been in the freezer for more than a year. Then, get down to business. Label anything that’s unlabeled, and then take inventory. Here’s how to put it all back together, for the better:
- Follow the Freezer Zones: Designate “zones” in your freezer for different items, and label them if that helps you and your clan abide. For example, I have a shelf for meats and seafood, a shelf for novelties (aka, ice cream), a shelf for flours and one last shelf for frozen fruits, vegetables and leftovers or items that are cooked and ready to be enjoyed again.
- File ‘em up: Instead of freezing sauces, cooked grains and rice (yes!), beans, soups or other items in clumpy lumps, freeze them flat on a sheet pan. Then, once they’re solid, line them up in your freezer like magazines. This strategy saves space and allows you to see what you have on hand at first glance.
- Ice, ice baby: Your ice cube trays are great tools for freezing small items like coconut milk, stock, wine, pesto and broth. Freeze them into cubes and store in a baggie for single-serving use.
- Blanch, squeeze, freeze: This is a great strategy for keeping greens easily on hand. Blanch greens, squeeze them of their excess water, then form them into balls and freeze them on a sheet pan. Freeze the greens balls solid, and store them in a baggie. Then, pluck them out for easy upgrades to omelets, pastas, soups and more.
Discover hundreds of healthy recipes — from high protein to low carb — via “Recipe Discovery” in the MyFitnessPal app.

