Sure, pushups look easy, but if you’ve ever done one, you know how challenging they truly are. This is because pushups require total-body strength and stability in order to be done correctly. In addition to recruiting muscles in your chest, triceps and shoulders, pushups are a total-body move that also taxes your abdominals, glutes and quads.
“A lot of people think of a pushup as being an upper-body exercise, but it’s also a core and full-body strength move,” says Haley Shevener, a certified strength and a conditioning specialist in San Francisco, California. “You have to be able to keep yourself in a solid plank position throughout the entire range of motion.”
If you want to be able to perform full pushups, you need to prioritize the actual movement in your practice — even if that means you’re doing modified pushup variations. This is known as the principle of specificity or the idea your body adapts to the specific demands you place on it.
When practicing modified pushups, you’re better off elevating your hands on a surface than doing the bent-knee variation; performing pushups from your knees changes the angle of the exercise, making it tricky to develop the full-body tension you need to execute regular pushups.
When you elevate your hands, you’re better able to progress to full pushups by gradually lowering the surface height until you’re finally at ground level. “You’re using that straight line point that you’re going to be using once you get to having your hands on the ground,” Shevener says.
You may practice pushups 2–3 times per week; just be sure to give yourself at least 24 hours of recovery before hitting that movement pattern again. Start at an incline that allows you to perform a pushup with proper form and do two sets of however many you’re able to do, while leaving two or three reps in reserve. Gradually tack on reps every week, lowering the surface height as you feel able.
“You don’t want to do incline pushups at a rep or set scheme where you get so tired from it that you can’t do it for another week, but you also want to make sure you’re progressing appropriately so it gets more challenging,” Shevener says. This way, your body is forced to adapt to new loads, ultimately making you stronger.
Once you’ve practiced incline pushups for a few weeks, you may start adding in eccentric pushups (description below) on the floor or at an incline.
Try these pushup modifications in lieu of bent-knee pushups:
INCLINE PUSHUP

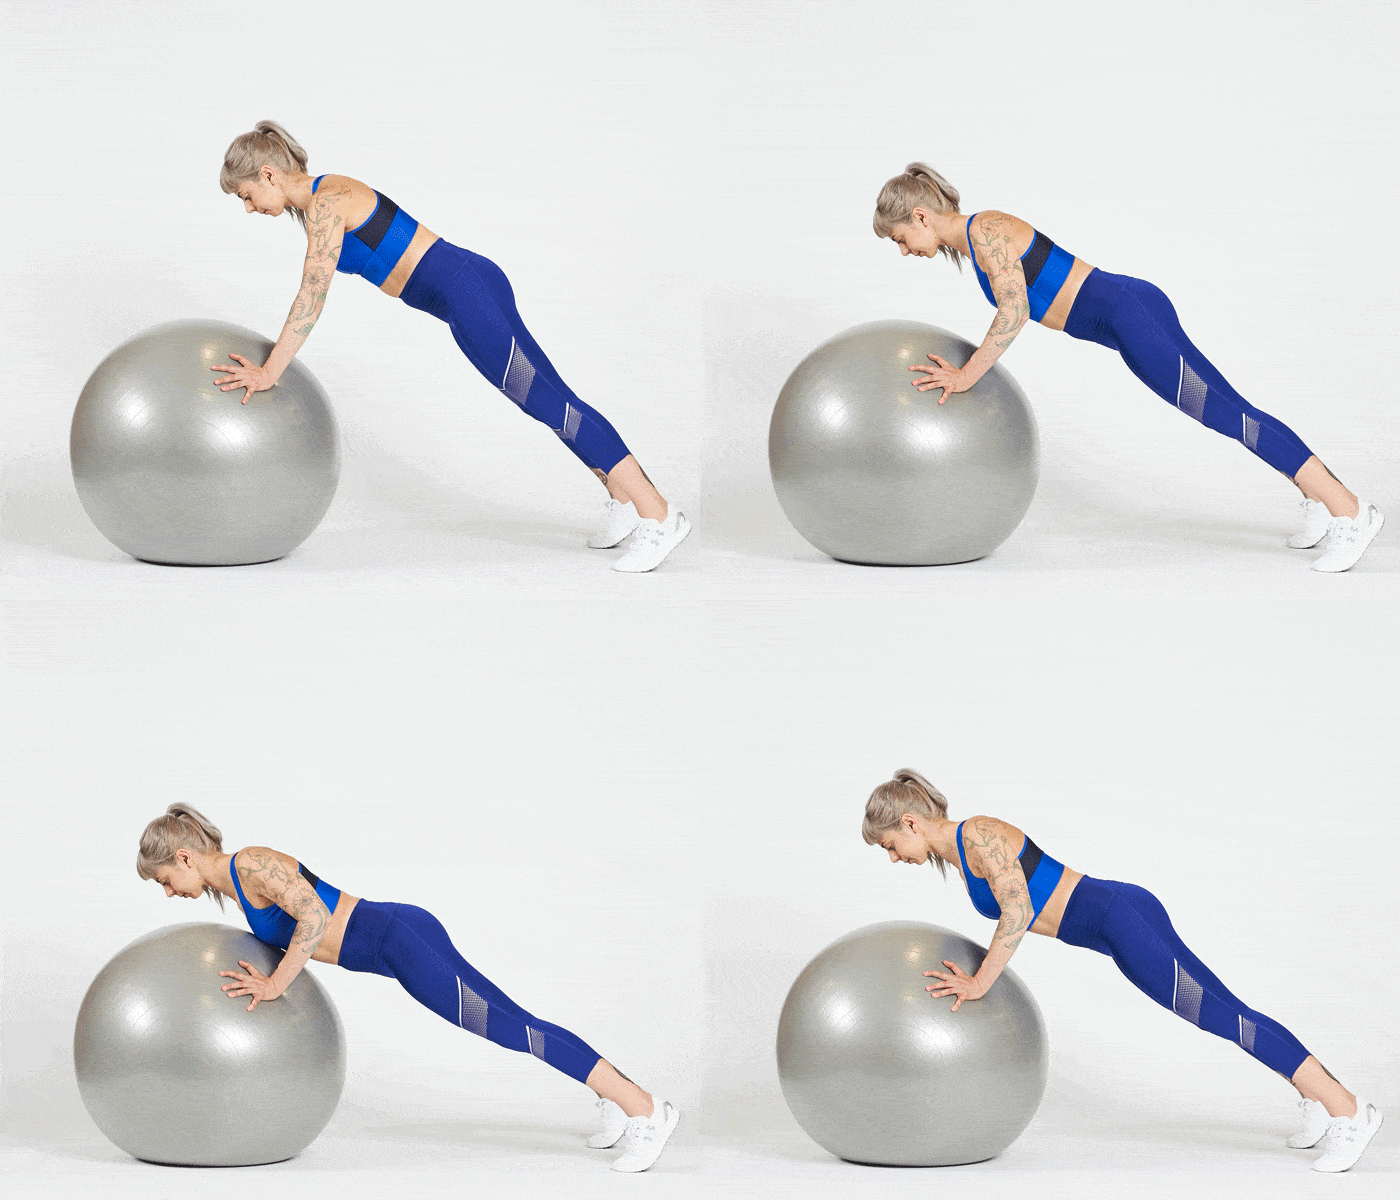
Elevate your hands on a box, bench, step, bar in a Smith machine or on a stability ball (Note: This is advanced.) so your hands are directly under your shoulders. Step your feet back until your body is in a straight line from your head to your heels. Then, bend at the elbows to lower your chest with control. Once you’re in the bottom position, push yourself up until your arms are straight once again. Don’t let your hips or upper back sag, and make sure to keep your elbows close to the torso throughout the movement.
ECCENTRIC PUSHUP
You can perform these on the floor or with your hands elevated. In either case, set up in pushup position. Then, bend at the elbows to lower your chest as slowly as you can while maintaining control. Once you’re in the bottom position, drop to your knees or step forward (if you’re in an incline pushup position) to help you push back up. Reset and repeat. Don’t let your hips or upper back sag, and make sure to keep your elbows close to the torso throughout the movement.
In addition to practicing pushups, you can break down the pushup movement and work on the separate components. “You need to be able to maintain that plank position, but you also need the mechanics and strength to push off the ground,” Shevener says. “You can build up your triceps, your pecs and your shoulders and all of the surrounding structures that will assist that movement.”
Incorporate the following strength and stability exercises into your routine to shore up the muscles you’ll need for pushups.
Note that set and rep schemes vary depending on your goals, current fitness level and available equipment, but in general, the American College of Sports Medicine recommends new lifters (those who have never lifted weights or who haven’t trained for several years) stick with 8–12 reps. Meanwhile, intermediate (those with at least six months of consistent training) and advanced lifters (those with one or more years of consistent training) can take advantage of a variety of rep ranges.
DUMBBELL CHEST PRESS

Begin seated at the edge of an exercise bench with a dumbbell resting on each knee. Carefully lean back and lift your knees to bring the weights back with you until your back is flat against the bench, arms are bent and dumbbells are at chest height. From there, press the dumbbells straight up over your chest. Then, lower the weights with control until your elbows dip just below the height of the bench. Pause at the bottom for one count, then press the weights overhead. Keep your arms close to your body and your feet planted on the floor throughout the movement.
DUMBBELL FLOOR PRESS
Begin seated on the floor with a pair of dumbbells between your legs. Lift the weights onto your lap and, keeping them tucked tight against your chest, carefully lean back until you’re lying on the floor with your knees bent and feet flat on the ground. Holding a dumbbell in each hand with your palms facing toward your feet, press the weights straight up over your chest. Then, lower the weights with control until your elbows make contact with the floor. Keep your arms close to your body and your feet planted on the floor throughout the movement.
DUMBBELL CHEST FLY

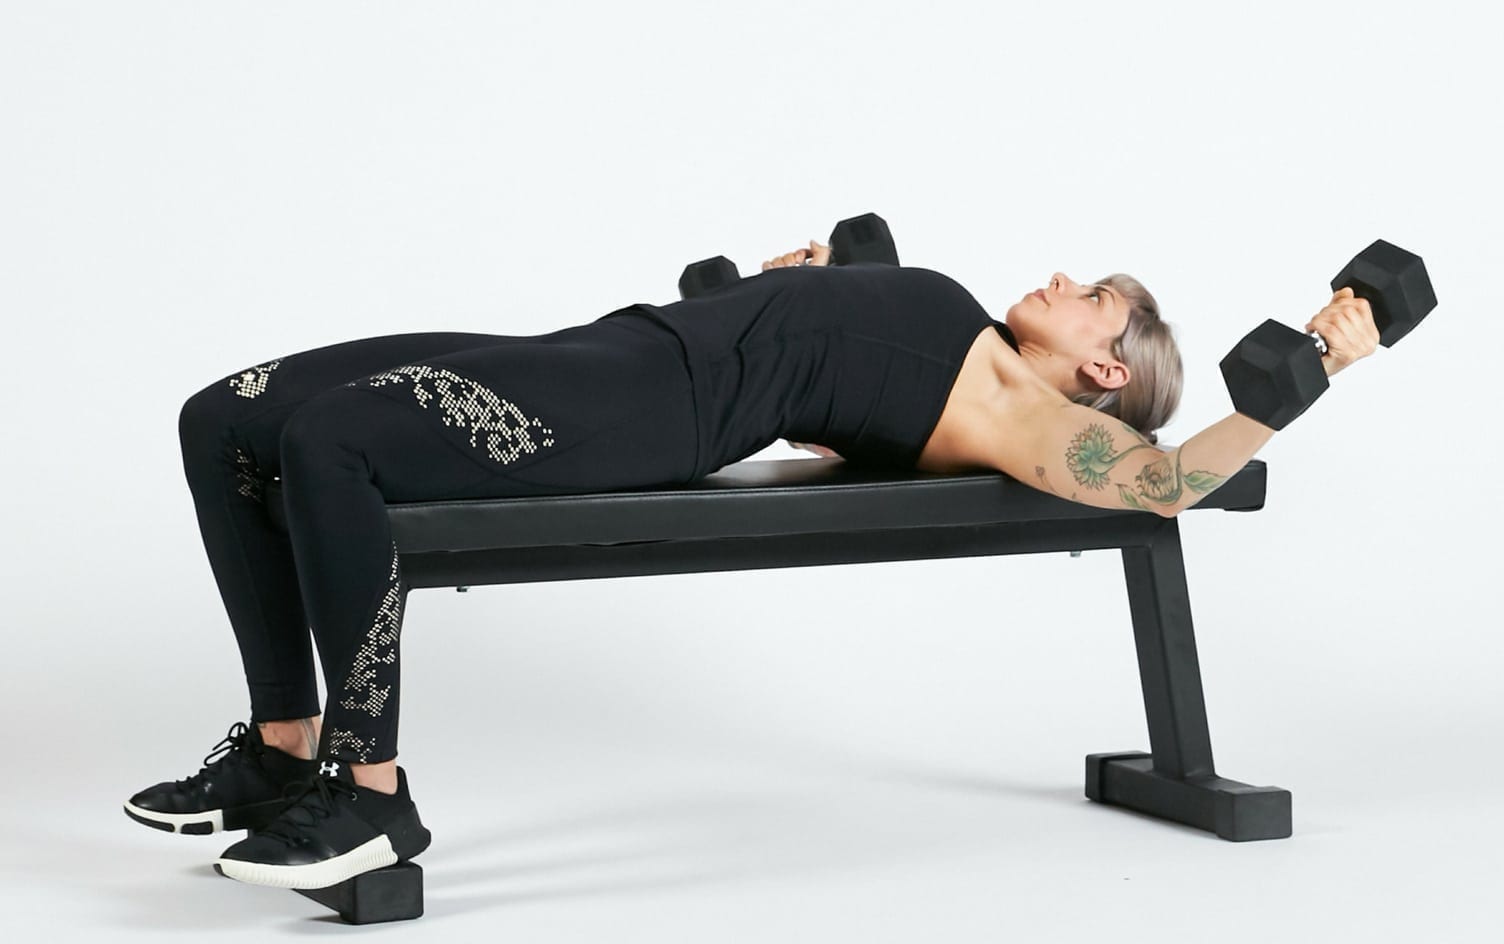
Begin lying faceup on an exercise bench (or on the floor). Hold a dumbbell at your chest in each hand with palms facing each other. Press the weights straight up over your chest. Keeping a slight bend in the elbows, open your arms to lower the weights until your elbows reach the floor. If you’re on a bench, stop before your elbows dip below the bench. Without bending your arms, push the weights back together.
PLANK

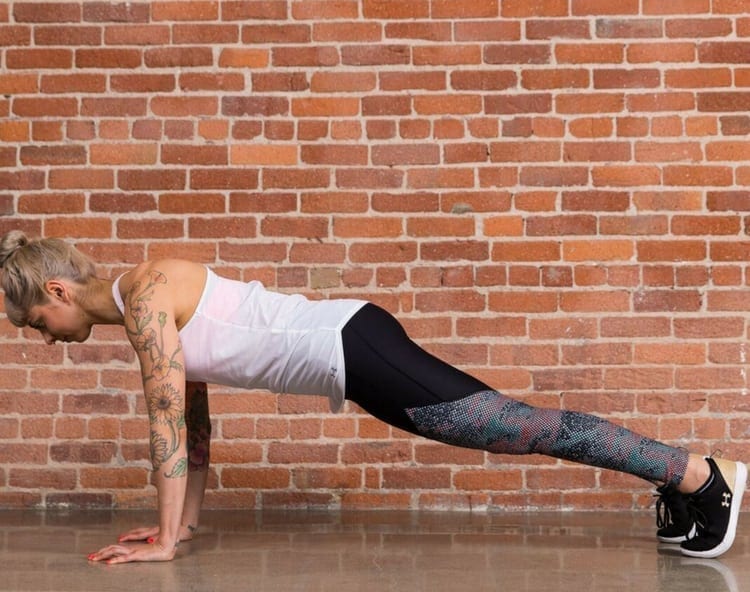
Begin on the floor on all fours with palms beneath your shoulders. Extend your legs out behind you and lift your hips so your weight is on your toes. Keep your back flat and your body in a straight line. Contract your midsection and hold for as long as you can before you feel your lower back begin to sag toward the floor. If you’re unable to do a straight-arm plank on the floor, elevate your hands on an exercise bench or lower onto your forearms.


