Whether it’s a job or a workout, trying anything new can be intimidating. When it comes to yoga, there’s no shortage of “what is happening here?” moments that can make a person feel out of sorts from the first vinyasa.
Here, experts give us the lowdown on everything a beginner needs to know when it comes to the 5,000-year-old practice — from what’s up with all that “om-ing” at the start of class to why we lay in savasana when it’s all said and done. Plus, the essential poses to know before you sign up in the first place.
THE BASICS
1. THERE ARE NO SHOES IN YOGA
No shirt, no shoes, no problem (OK, don’t forget the sports bra, ladies). Traditionally practiced barefoot, yoga can be done anytime, anywhere and gear-free. “Practicing barefoot allows you to feel the earth, feel your feet touching the earth and be a point of contact over and over again in each pose,” says Heather Peterson, chief yoga officer at CorePower Yoga.
But the whole barefoot thing is bigger than just a spiritual connection. Practicing your flows sans shoes helps build strength in small stabilizer muscles in your feet, ankles and calves which support balance. Plus, ditching the kicks can amp up your proprioception or how your feel your body in space. This allows you to be more agile and efficient in and out of the workout studio, says Peterson.
2. PRACTICE SHOULDN’T BE PAINFUL
While it’s normal to grunt through a set of squats or burpees in a high-intensity workout class, yoga is often meant to be more restorative and centered around that mind-body connection.
“The more you practice yoga, the more you’re building awareness in your body,” says Peterson. “Some postures bring up discomfort and some feel really good, but you always want to avoid pain.”
This is where popular modifications come in. For example: Does it absolutely kill your hamstrings when you go into a forward fold? Then, bend your knees slightly to bring your chest closer to your quads. Your instructor is there to make sure your experience is comfortable, and offer simple tweaks when needed.
3. THE “OM” CHANT HAS A PURPOSE
A Sanskrit word that represents the beginning, middle and end of all things, om (actually pronounced correctly to be “aum”) is a center point for most yoga practices. Chanted at both the beginning and end of class, the aum is meant to have a physical effect on the body by calming the mind and nervous system. “Yogis said the benefit of chanting ‘aum’ was felt by anyone that could hear and feel the vibration, whether they chanted or not,” says Peterson. “Also, it’s not the actual sound quality of the aum that matters, it’s the subtler vibration that attunes us. So you don’t have to be Justin Bieber or Ariana Grande to chant, just try.”
4. SAVASANA IS IMPORTANT (DON’T SKIP IT)
It’s always a nice reward when your instructor tells you class is coming to a close. You’ve made it to savasana, or the final resting pose, which is your cue to lay quietly on your back, palms up, eyes closed. But this is bigger than a nice pat on the back for all your effort.
“By stepping onto our mat we are leaving behind work, emails, texts, social media and phone calls. Because we step on an empty mat, our mind is less ‘full’ of the clutter of comparison and competition – and we can practice self-awareness,” says Peterson. “At the end of practice when you are in savasana, you feel a build-up of self-consciousness which releases into that incredible post-yoga feeling. That’s when you know the poses and chakras are working.”
Tip: Although it may be tempting to doze off at this point, work to be present in savasana. Focus on your breath and reep in the benefits of your practice.
THE POSES TO KNOW BEFORE YOU GO
Now that you’ve got the basics, it’s time to discuss poses. Here are four essential poses critical to any beginner practice:
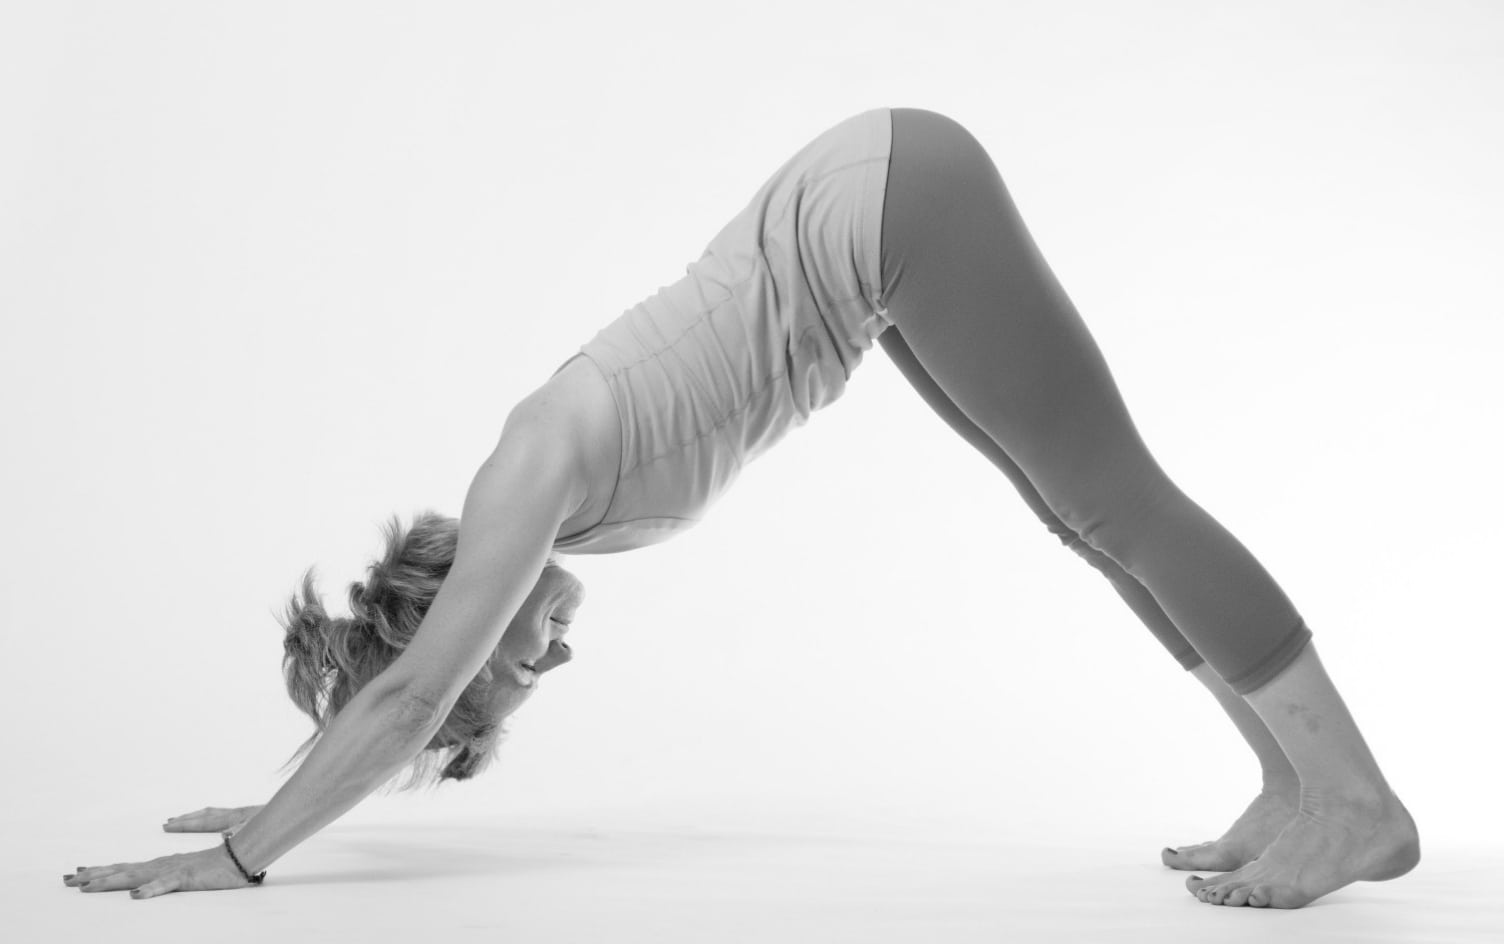
1. DOWNWARD FACING DOG

Sanskrit name: Adho Mukha Svanasana
The move: Come onto your hands and knees, hands under shoulders and knees under hips. Spread your hands wide and press your index finger and thumb into your mat. Lift your tailbone and press your glutes up, draw your hips toward the sky, and lengthen the back of your legs. Draw your ears in between your upper arms, away from your shoulders, and press your heels gently toward the floor — they might not touch. Hold for 5–10 breaths.
Priorities for beginners: Having a long spine, even if you have to bend your knees is crucial. Spread your fingers wide (especially your thumb and pointer finger) and grip your mat with your fingertips to take the weight out of your wrists and put more weight into the pad where your first finger and thumb insert into your palm.
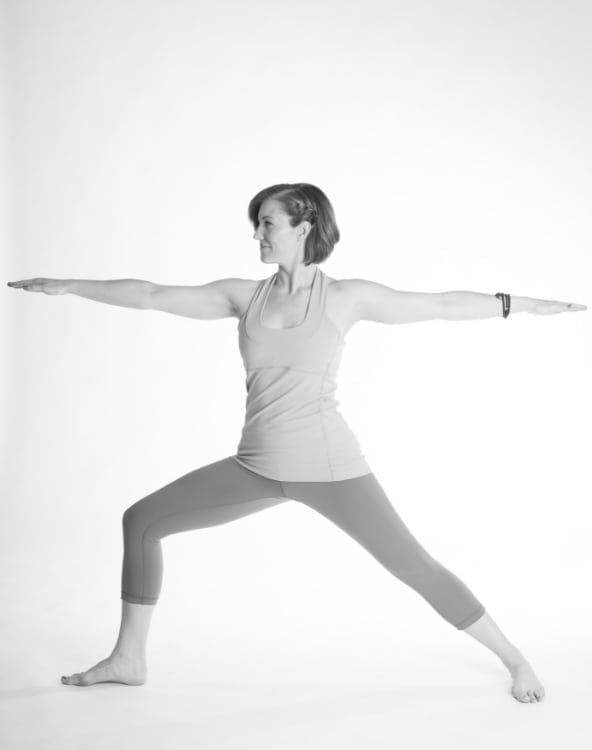
2. WARRIOR 2

Sanskrit name: Virabhadrasana 2
The move: From low lunge, spin your back heel down. Open your torso to the side on an inhale and elevate your arms parallel to the ground and extend your arms away from each other. Bend and point your front knee forward at or near a 90-degree angle. Hold for 1–5 breaths.
Priorities for beginners: Keep your front knee over or behind your ankle, even if you reduce the depth of your lunge. Turn your hips to the side until they stop, then complete the rotation to the side with your ribcage.
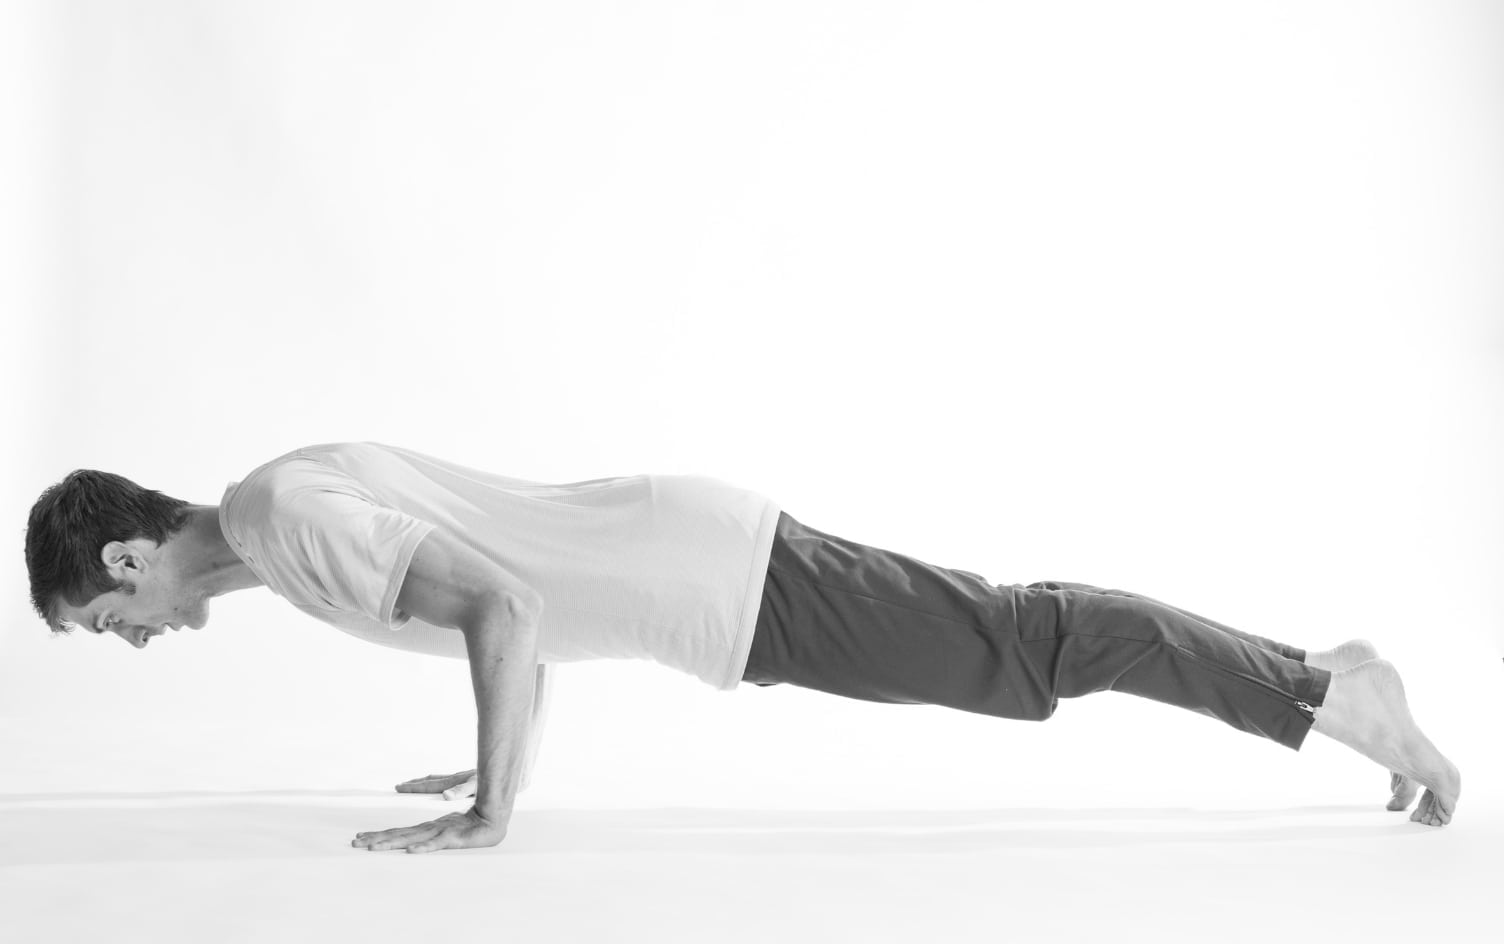
3. HIGH-TO-LOW PUSHUP

Sanskrit name: Chaturanga Dandasana
The move: Start in a high plank with shoulders stacked over your wrists. Engage your legs and core to keep your belly from hanging down toward the floor. Ground down through the inner edges of your hands, feel your shoulder blades press into your back, lower down to a low plank. Keep your elbows tucked in close to the side of your body. At the bottom of the position, the angle of your elbow should be near 90 degrees, but no less. Hold for 1 breath.
Priorities for beginners: Your shoulders should be no lower than your elbows, even if you drop to your knees to make this action.
4. MOUNTAIN POSE
Sanskrit name: Tadasana
The move: Stand with your feet hip-width apart or your toes together and heels a sliver apart. Spread your feet and place your weight evenly through the entire foot from front to back and side to side. Inhale, reach your arms overhead, while pressing down into your feet. Draw your tailbone down and bring your front ribs in and down toward your hip points to engage your core. Take long, slow, deep breaths in and out of your nose. Breathe, relax, feel, observe and allow. Hold for 3–5 breaths.
Priorities for beginners: Arms should be in line with your ears even if you have to widen your arms to make that happen.


