There’s an unofficial yoga posture almost everyone does in their first few classes, it’s called the “twist-to-look-at-my-neighbor” pose.
It’s that trying-to-be-subtle look of newbies who are turning around to see what everyone is doing in an attempt to understand what the heck is going on in class. It usually comes from a lack of familiarity with the English or Sanskrit names of the postures combined with an “am-I-doing-this-right?” fear. And it’s totally normal.
If you’re new to yoga — or are thinking about giving it a try — learning a few essential poses that commonly pop up in a class is a good way to feel more confident.
Here are 11 must-know poses:
1. CHILD’S POSE
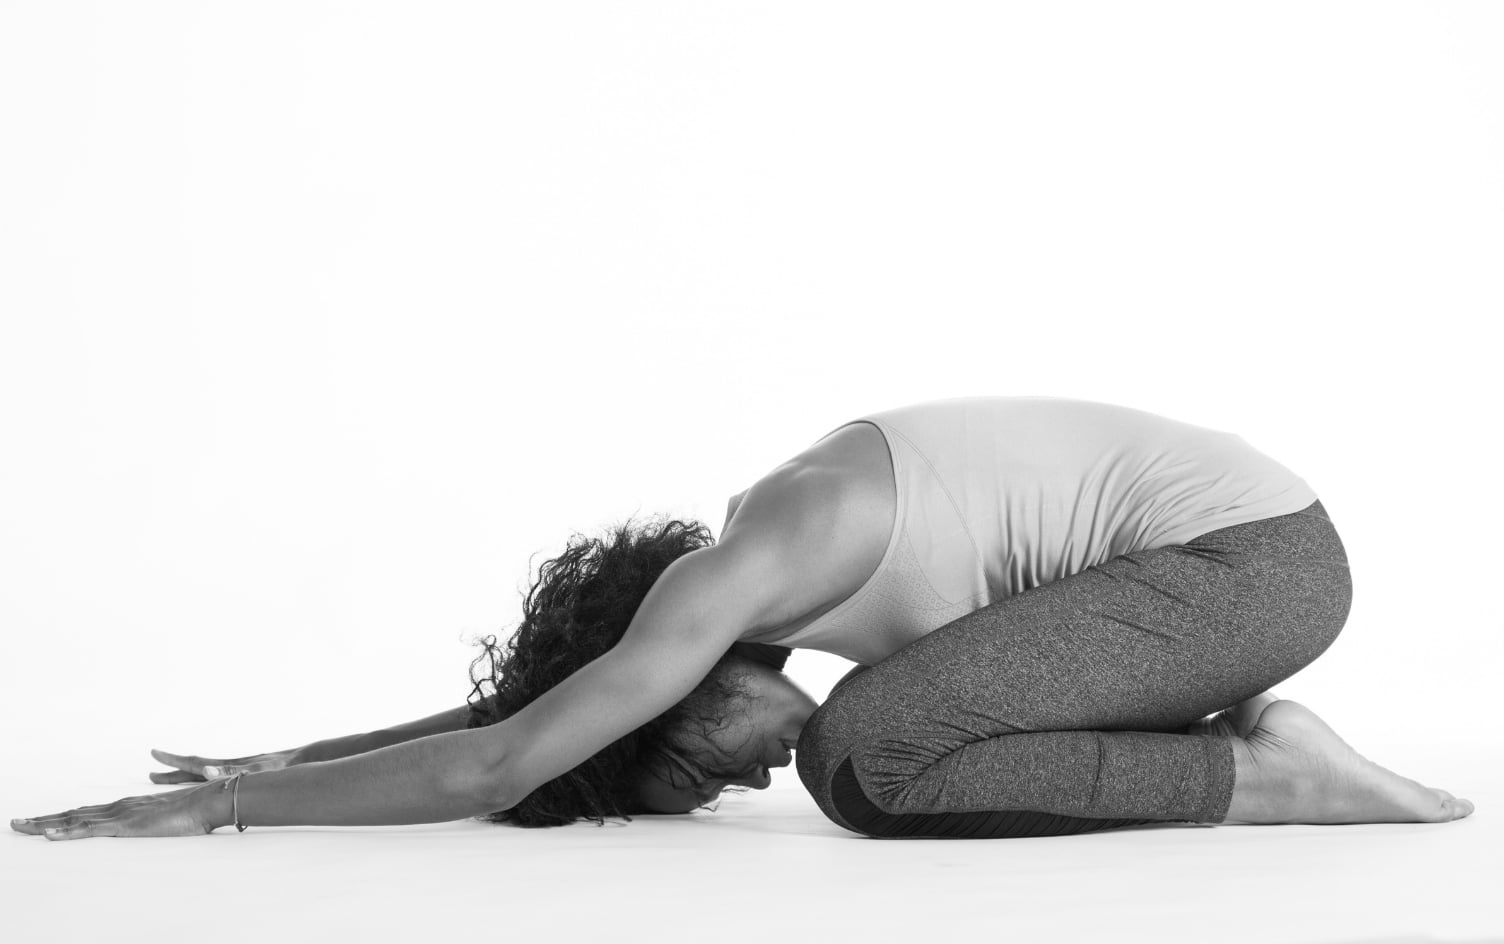
Child’s pose, a resting stop in many classes, is a salve that soothes and calms the body. It stretches the low back, hips, thighs and ankles. It also increases circulation to the head, which can relieve stress, fatigue and headaches.
The move: Kneel down and sit on your heels with your knees and feet together. As you exhale, bend forward, placing your forehead on the floor. Bring your arms to the floor next to your thighs with your palms up. Relax and let gravity help release your shoulders toward the floor.
2. DOWN DOG
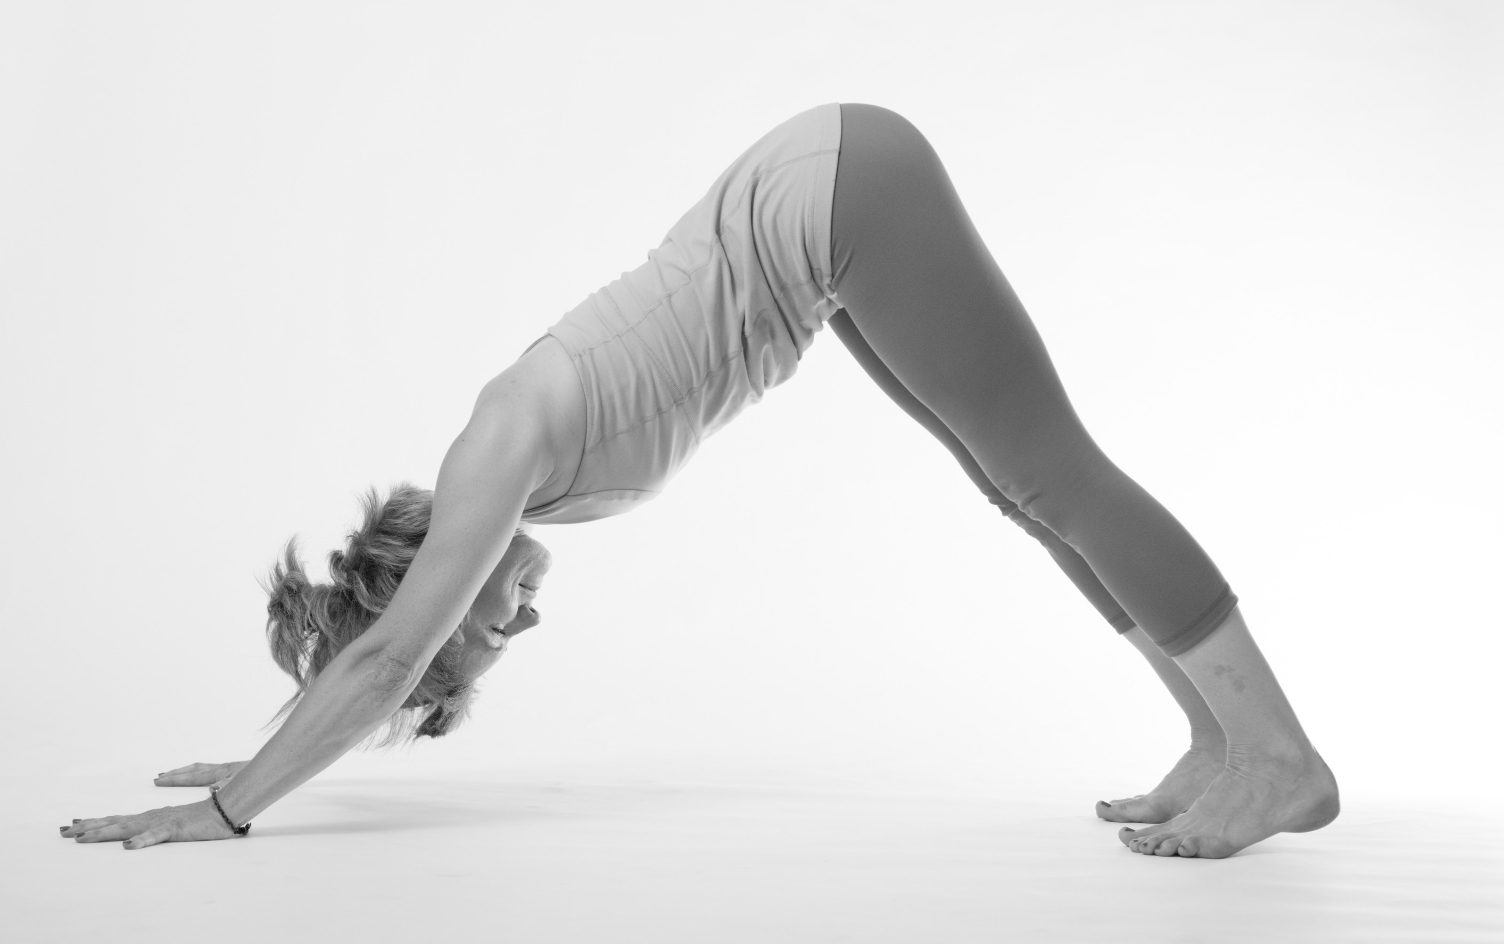
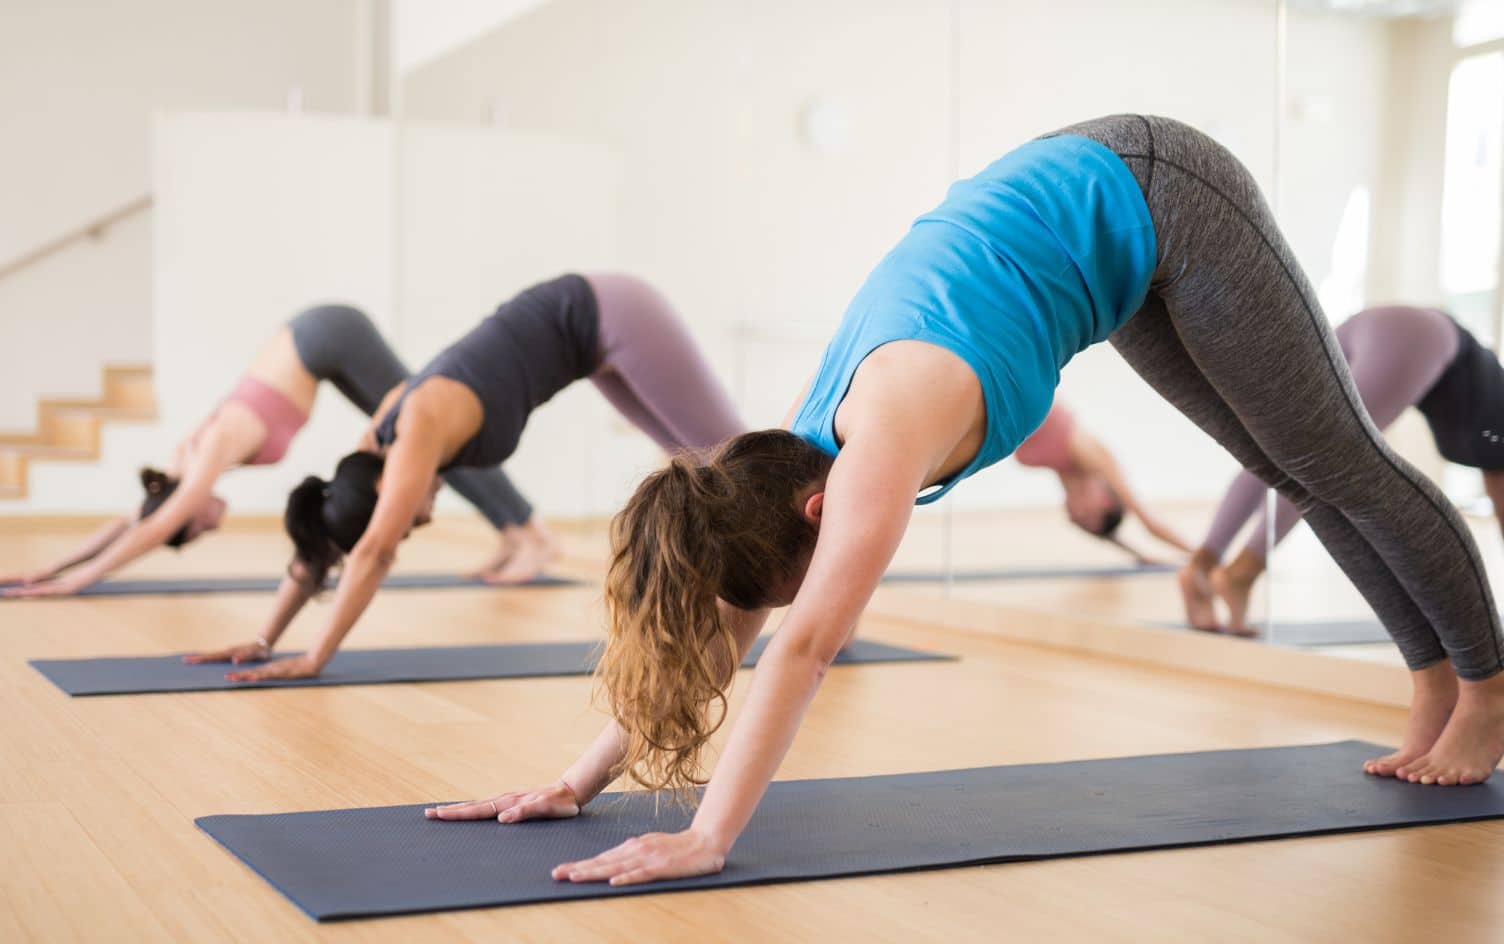
This foundational yoga posture is modeled after the post-nap pose pups take when they stretch their paws forward and lift their tailbones to the sky. There’s something to it: The pose releases the spine; stretches the hamstrings, calves and arms and strengthens the back and arms.
The move: Begin on your hands and knees in a tabletop position. Slide your palms forward so they rest in front of your shoulders and tuck your toes under. As you exhale, press your palms into the ground and lift your knees off the ground, straightening both arms and legs. Your body will form a wide, upside-down V shape.
Push your thighs back, pressing your heels toward the floor, without locking your knees. Beginners often struggle to keep their legs straight. It’s OK; keep a slight bend in your knees at first. Don’t worry if your heels don’t touch the floor.
Broaden your shoulders by rotating your arms slightly so your elbow creases face up toward the sky. Widen your hips and lengthen your spine. Your tailbone should feel as if it’s moving up and back to the upper corner of the room where the wall meets the ceiling. Relax your neck and take 5–10 breaths here.
3. PLANK
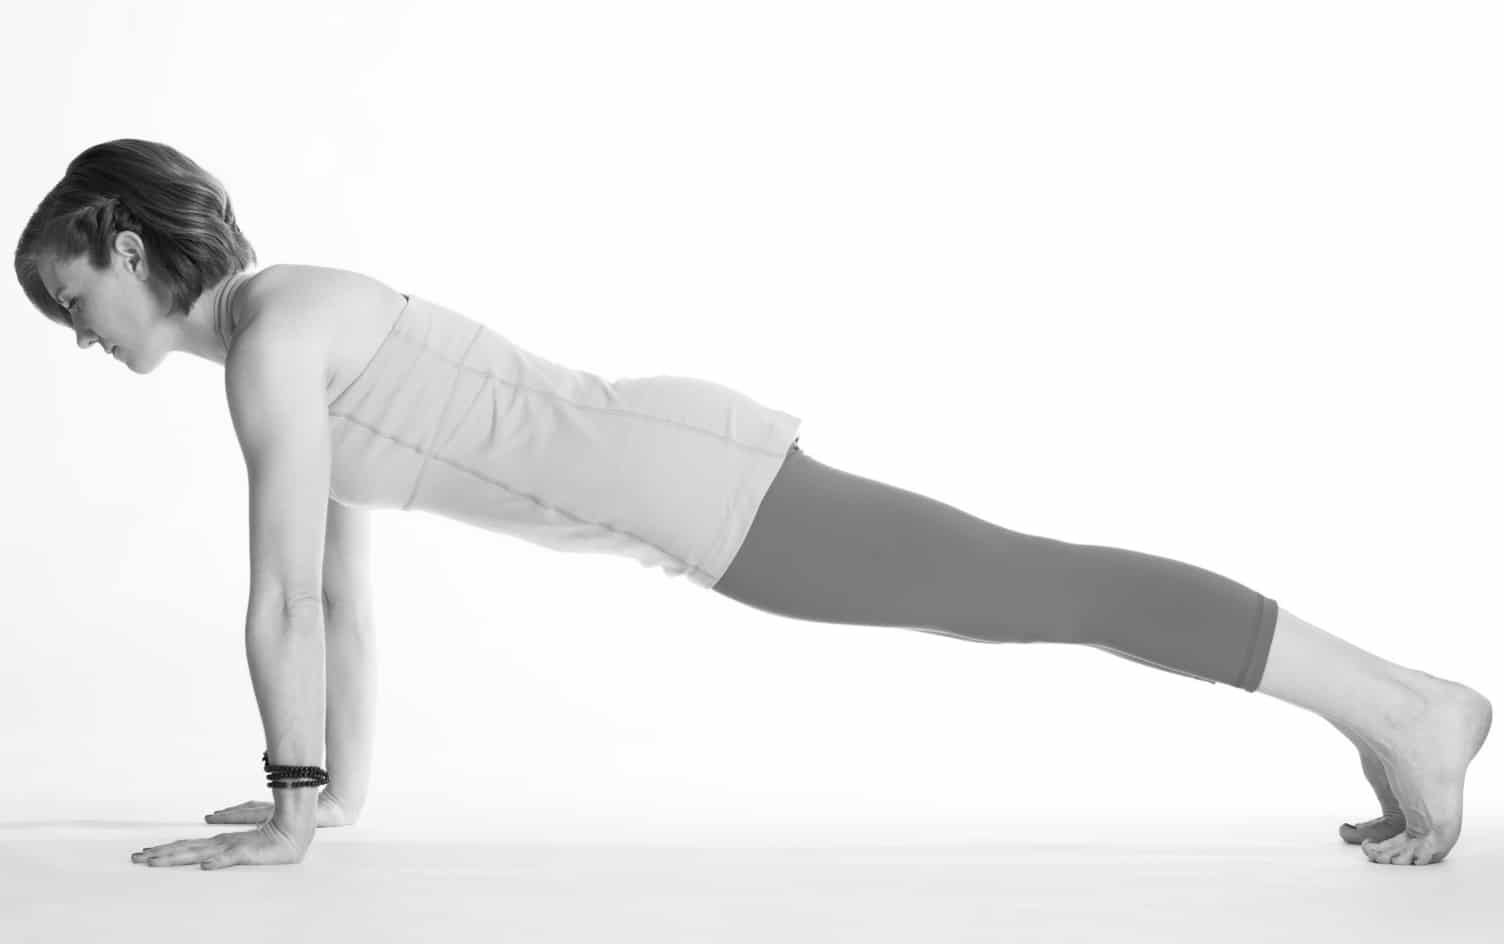
This total-body strengthener is great for the upper body, back and core.
The move: On your hands and knees, with your wrists directly under your shoulders, engage your abdominals, tuck your toes and step your feet back. Keep contracting the abdominals so you create one long line from your head to your heels and avoid sticking your butt in the air or drooping your belly down. Look slightly ahead of your fingers to keep your neck long. Hold for 5–10 breaths.
4. CHATURANGA
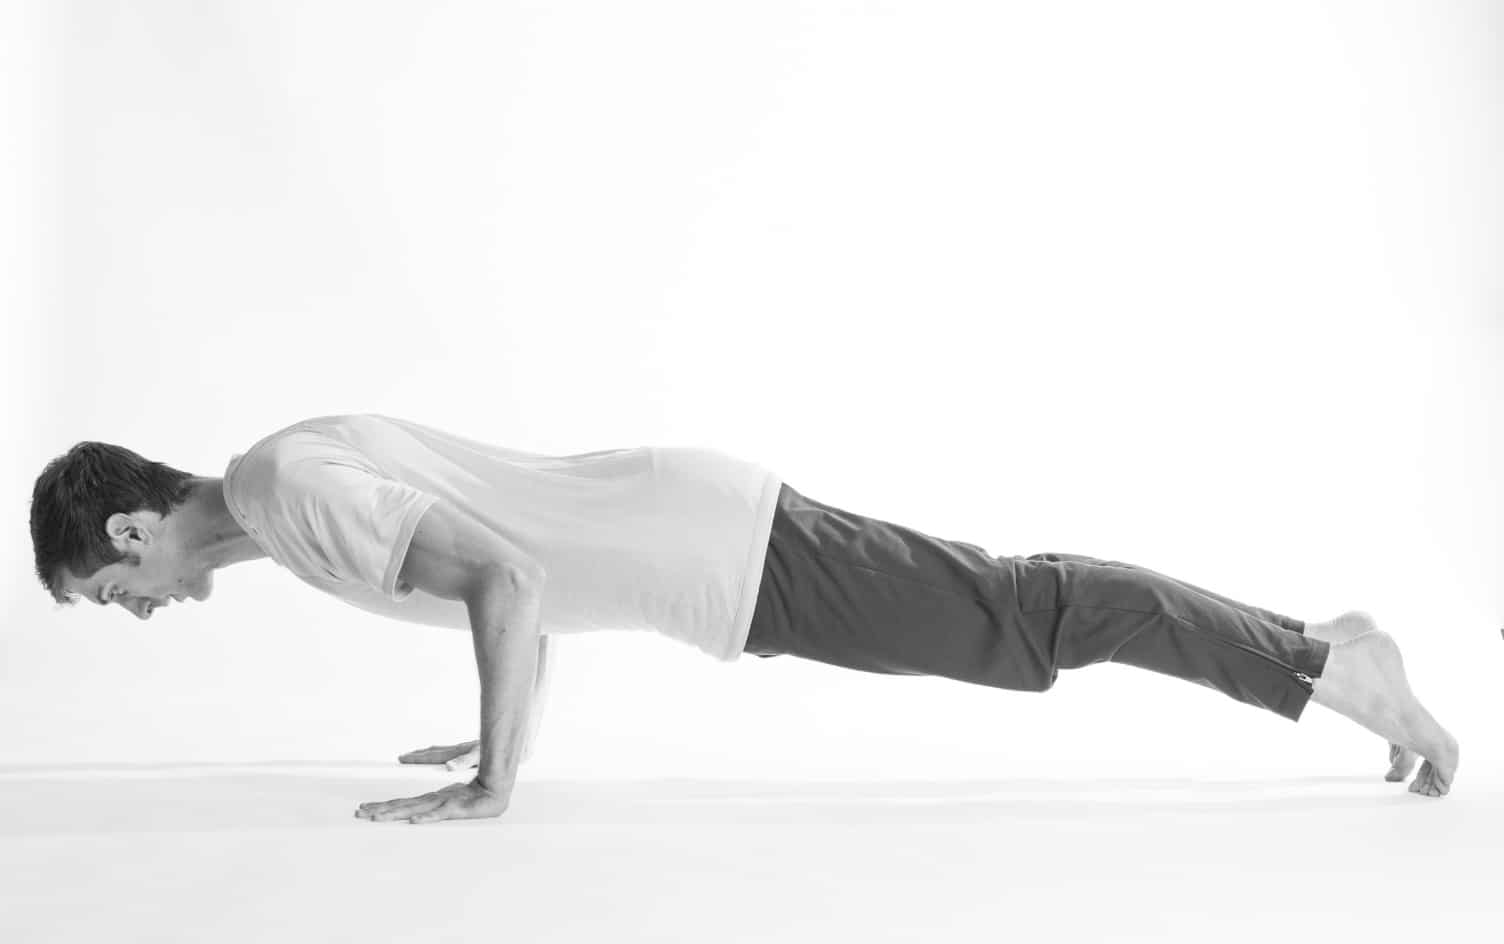
There’s no sugar-coating it: Chaturanga is hard. You’re using your body strength to hover inches off the mat — doing so requires engaging your shoulders, arms, chest, abdominals, back, thighs, calves and feet. Yup, it’s a head-to-toe workout in one pose.
It’s also a pose you’ll encounter dozens of times in just one vinyasa class. So rushing it, muscling through it or doing it wrong is no good. Doing a pose wrong over and over again is a surefire way to get injured. Take your time learning the pose, build up to it with knees-chest-chin (outlined below) and ask your instructor to check your form.
The move: Start in plank. Roll forward on your toes, bringing your chest through your arms. As you exhale, lower down until your arms form a 90-degree angle and stop.
There’s a tendency to lift the butt, creating an upside down V-shape, but keep your body firm and straight. Hug your arms into the sides of your body, elbows pointing back toward your toes. Keep your shoulders pulled back away from your ears, broaden through your chest and engage your core.
Knee-Chest-Chin Variation:
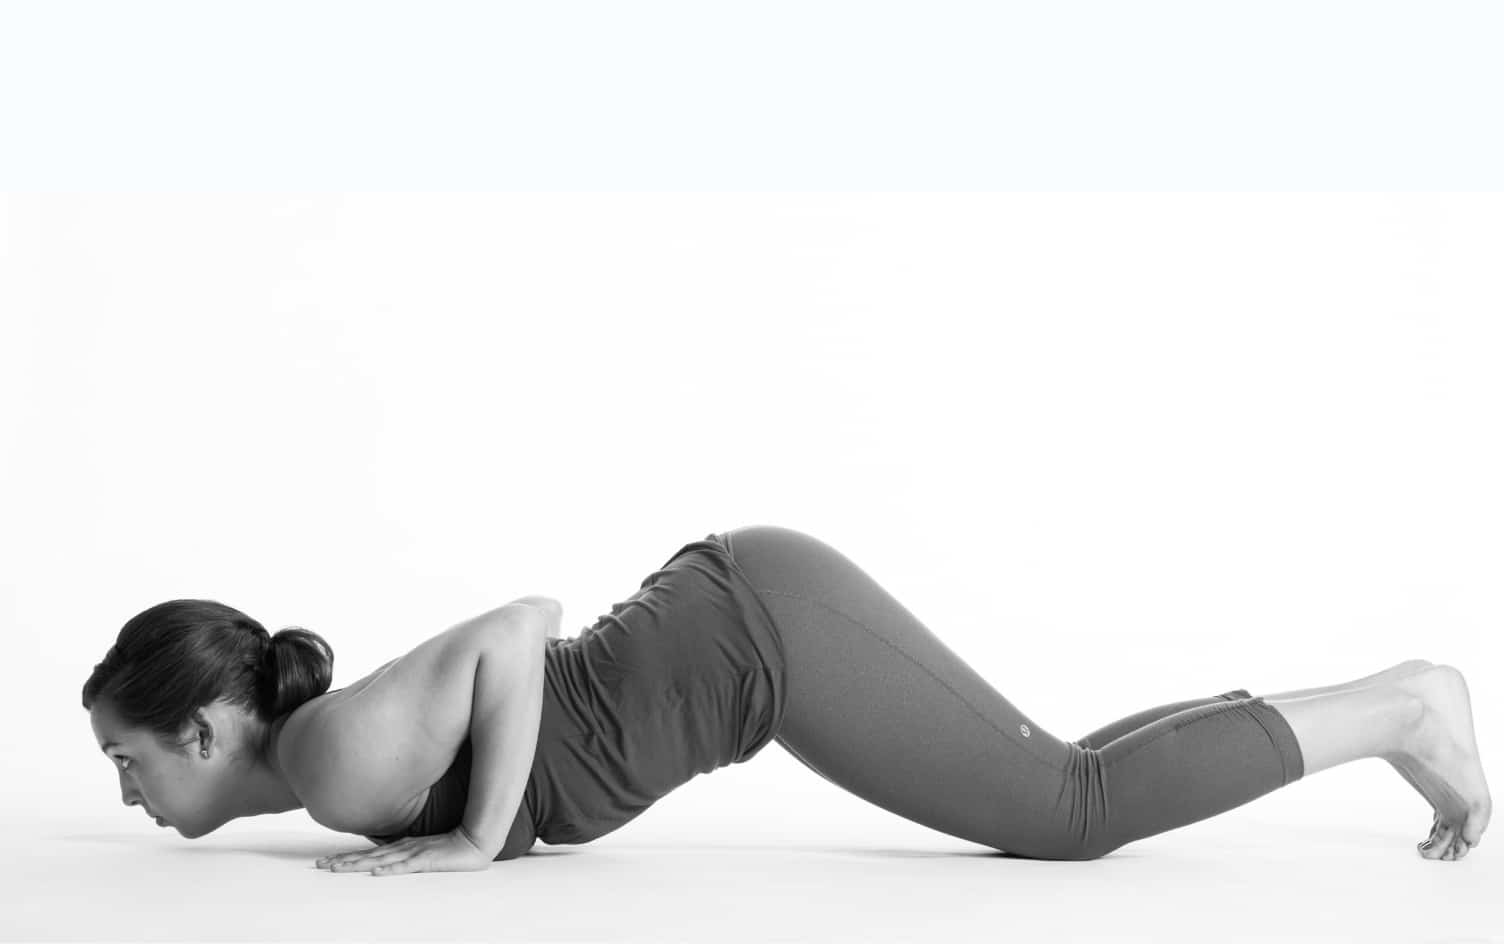
Use this pose to build up to chaturanga. Exhale and lower your knees to the floor. Keep your elbows tucked into your rib cage and lower your chin and chest to the floor. Hips stay lifted so you look like an inchworm.
5. COBRA/UPWARD FACING DOG
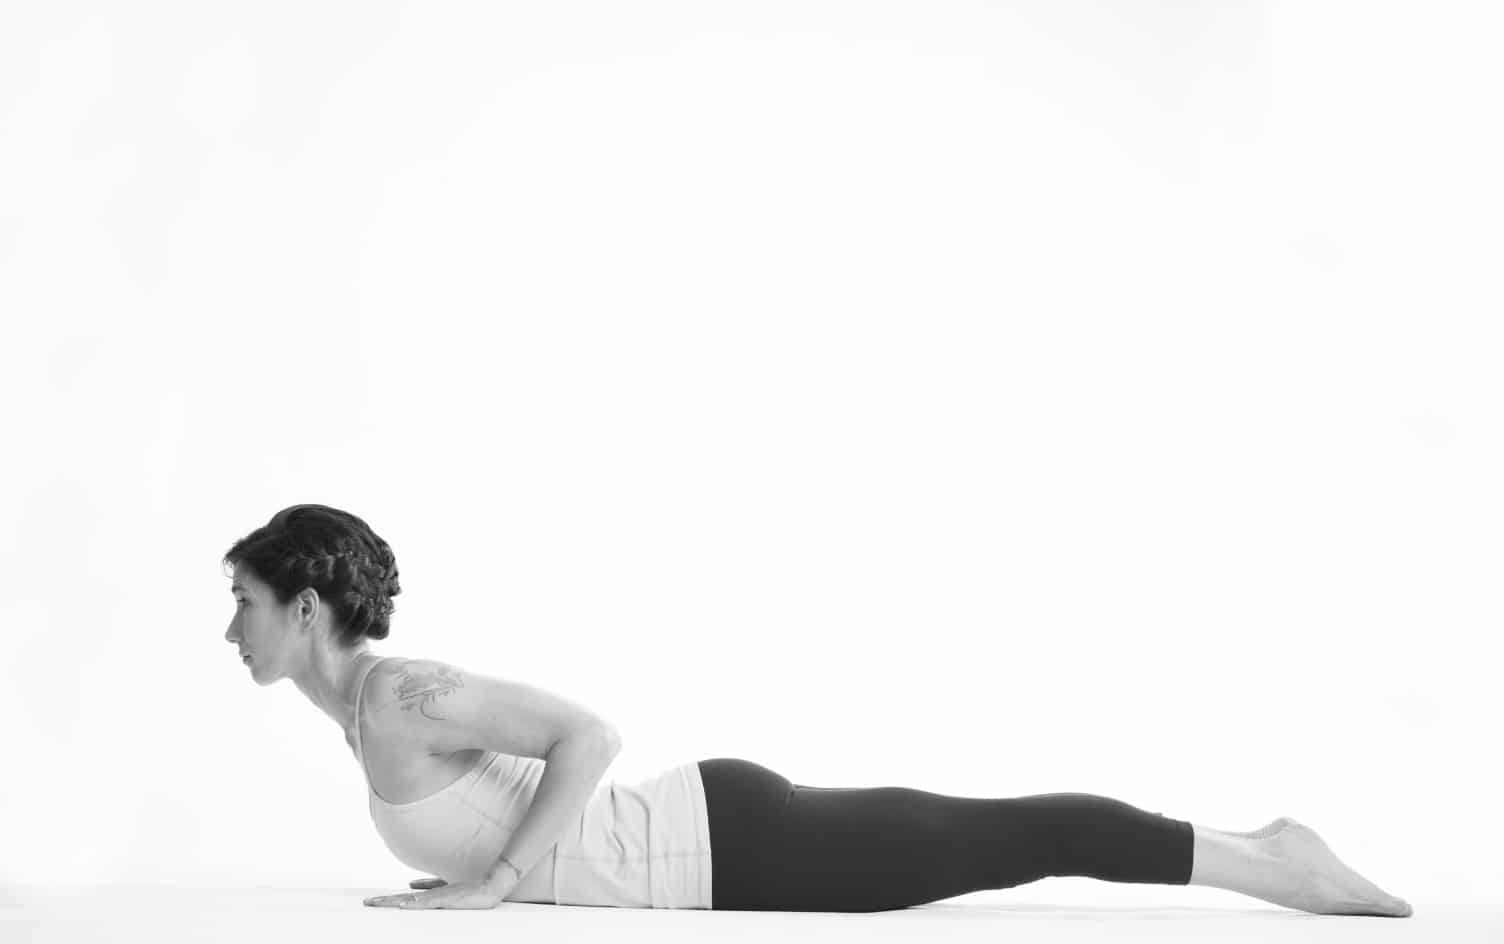
This gentle backbend, a regular part of vinyasa classes, is a great foundational backbend. It opens the heart, expands the diaphragm and strengthens the shoulders, arms and back.
The move: Ease into full cobra with a variation often called low or baby cobra. Begin lying down with your forehead on your mat. Place your hands under your shoulders, palms flat and elbows tucked into the sides of your body. Press the tops of your feet and thighs into the ground.
As you inhale, lift your head and chest off the floor. Lengthen your neck and keep your gaze forward to keep from straining your neck. Keep your elbows pulled in and draw your shoulders away from your ears. Gently lift your palms off your mat for a second to ensure the work comes from your back and core. Hold baby cobra for 3–5 breaths, then lower on an exhale and rest one cheek on the mat.
For full cobra, inhale and start to straighten your arms as you peel your upper body off your mat. Only straighten your arms as much as you can while keeping the work even throughout your entire core. And only lift as high as you can while keeping the tops of your feet, hips and thighs pressing into your mat.
Take 3–5 breaths in cobra. On an exhale, lower and rest the opposite cheek on your mat.
6. WARRIOR I
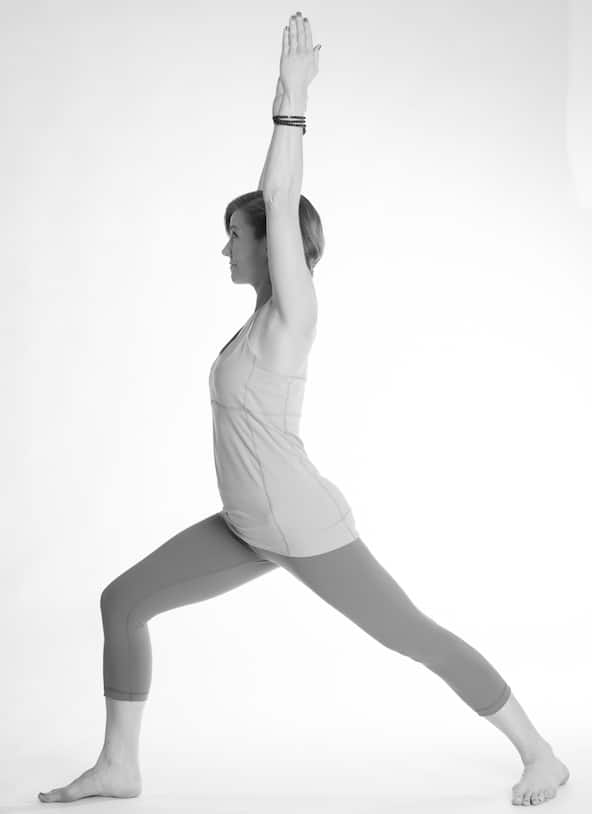
The Warrior postures, the bread-and-butter poses found in almost every modern yoga class, are vigorous and demanding. Tap into your inner warrior because they are worth it. They strengthen the legs — and warrior I strengthens and stretches the arms, shoulders and thighs.
The move: From down dog, step your right foot forward to low lunge. Ground your left foot down so it’s at a 45-degree angle and you’ve created a straight line between the heel of your right and left foot. On an inhale, lift your torso up and sweep your arms overhead. Keep your right knee bent and directly over, or slightly behind, your right ankle to protect your knees. Press the outside edge of your back foot into the mat. Gently work your left hip forward, trying to square your hips like headlights shining toward the front of your mat. But, if like me, you struggle to square your hips, slide your left foot toward the left edge of your mat and take a wider stance, which gives you more room to square your hips to the front edge of the mat.
Hold the pose for up to a minute. Then, on an exhale, take your hands to the mat, frame your right foot, and lift your left heel for low lunge. Step back to down dog and repeat on the other side.
7. WARRIOR II

In addition to strengthening the legs, warrior II opens the groin and chest.
The move: From down dog, step your right forward to low lunge. Ground your left foot down so that it’s at a 90-degree angle and you’ve created a straight line between the heel of your right foot and the instep of your left foot.
On an inhale, sweep your left arm up and around, bringing your torso and right arm with you. Arms stretch in opposite directions, palms down and parallel to the floor. Hips face the long edge of your mat.
Strengthen the pose from the bottom up. Press the outside left edge of your foot into the ground and make your entire left leg strong. Make sure your right knee tracks over your right ankle. Glance down and see if you can spot your big right toe to make sure your knee isn’t rolling inward. Tuck your tailbone slightly and engage your abdominals. Roll your shoulders down your back and take your gaze over your right index finger. Relax your eyes and hold the pose for up to a minute.
On an exhale, cartwheel your hands down, framing your right foot and finding low lunge. Step back to down dog and switch sides.
8. EXTENDED SIDE ANGLE
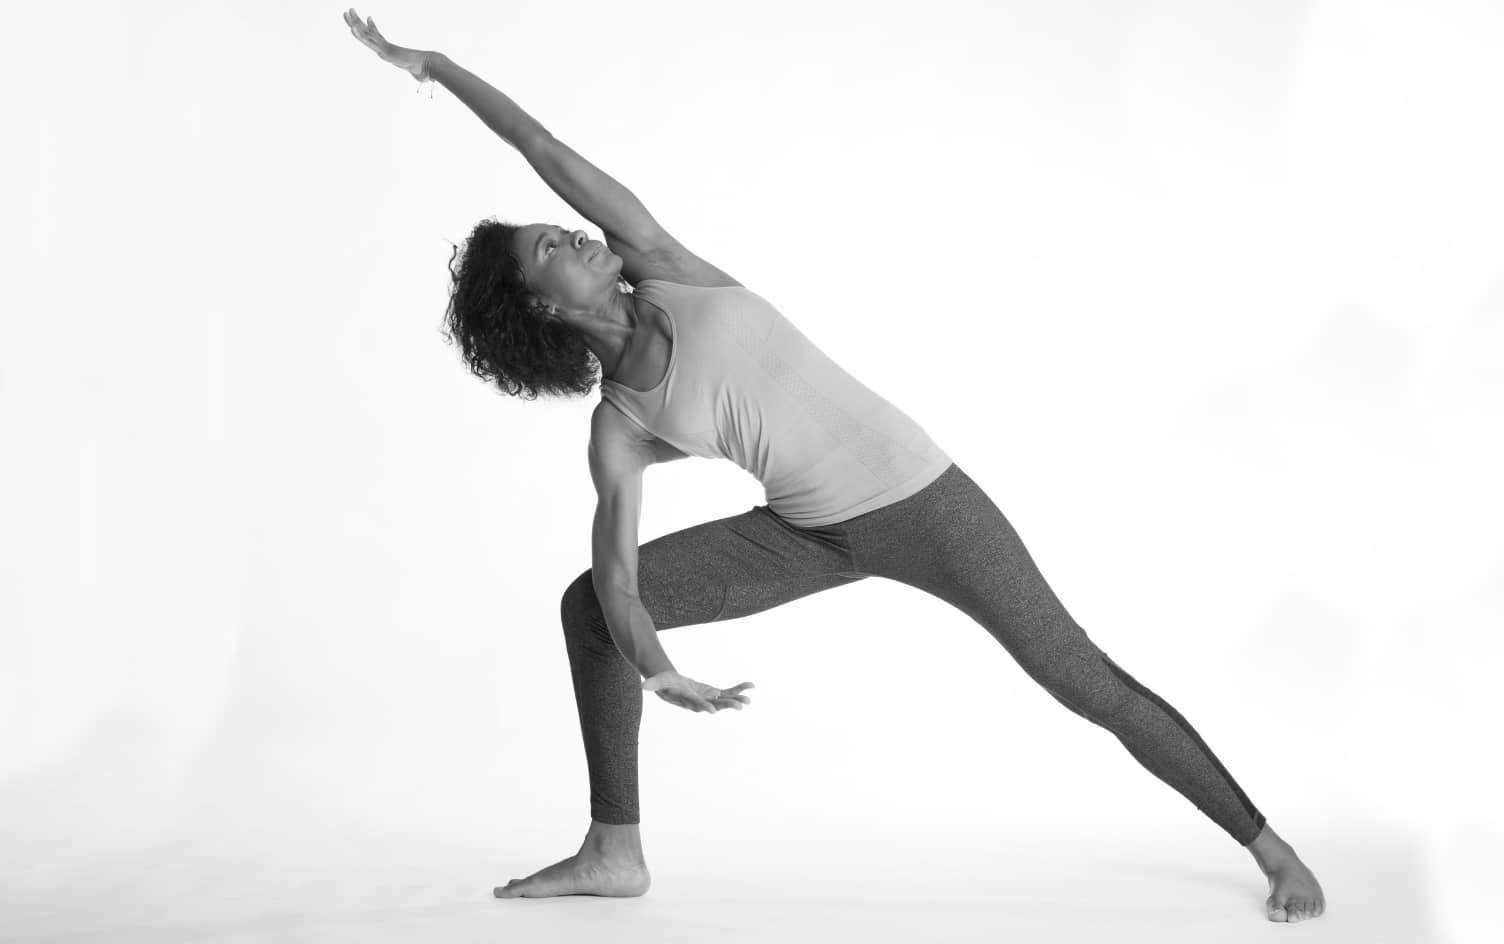
Extended side angle has been known to turn legs to jelly; it’s a challenging pose that promotes strength and flexibility. The pose strengthens the thighs and ankles while stretching the groin, chest and side of the body.
The move: Begin in warrior II with your right foot forward. On an exhale, rest your right forearm lightly on your right thigh and sweep your left arm over your ear, creating a straight line from your left fingertips to your left ankle. Make certain your right knee is directly over your right ankle and engage both legs. Lengthen through the entire left side of your body, and, if it’s comfortable for your neck, take your gaze to the sky under your left armpit. Find length through the right side of your body and avoid sinking into your right thigh.
Deepen the pose by taking your right hand to a block placed inside the right foot or by taking your right hand to your right foot. Gently press your right arm into your right leg to open your hip. Keep spinning your chest toward the sky. If you find your chest turns to the floor, lift back up to the block or your thigh.
Hold the pose for up to a minute. Then on an inhale, lift to warrior II and repeat on the other side.
9. TRIANGLE
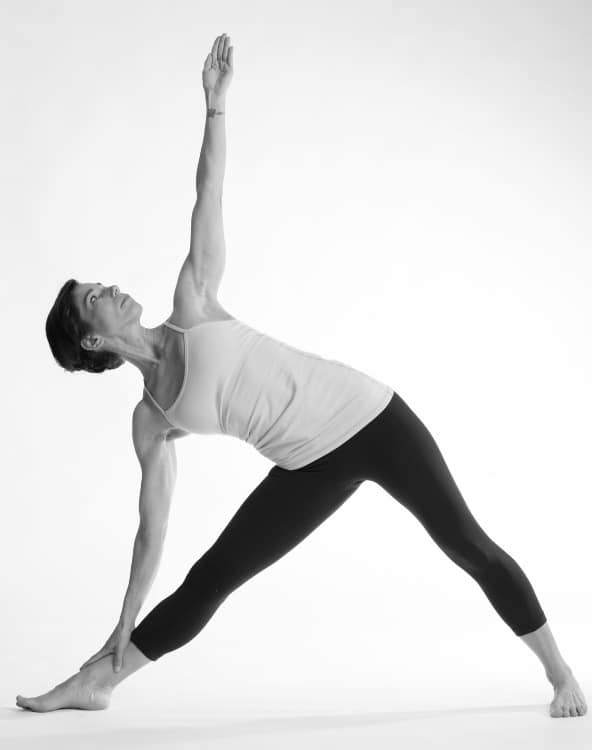
In everyday life, most of us have little interest in the floor below our feet. Then we come onto our yoga mat, and suddenly we can’t wait to touch the ground. When you come into triangle, remember it’s the same old floor and focus on finding expansiveness in the pose whether or not your fingers reach the ground. That expansiveness will help you stretch your hips, groin, thighs, hamstrings, shoulders, chest and spine.
The move: Stand facing the long edge of your mat with your feet 3–4 feet apart. Turn your right foot to face the front edge of your mat, and turn your left toes in slightly so your right and left heel line up.
Extend your arms parallel to the floor. On an inhale, reach your right arm and torso forward. On an exhale, spin your right arm toward the floor and your left arm to the sky so you’ve created a straight line between your left and right fingers. Your right hand can rest on your thigh, shin, ankle or floor. Keep the right side of your body long. If you’re compressing through your right waist, lift your right hand up your leg until you find length. Take your gaze toward your left thumb and hold here for up to a minute. On an inhale, lift up out of your waist, flip-flop the feet and find triangle on the other side.
10. FIGURE FOUR
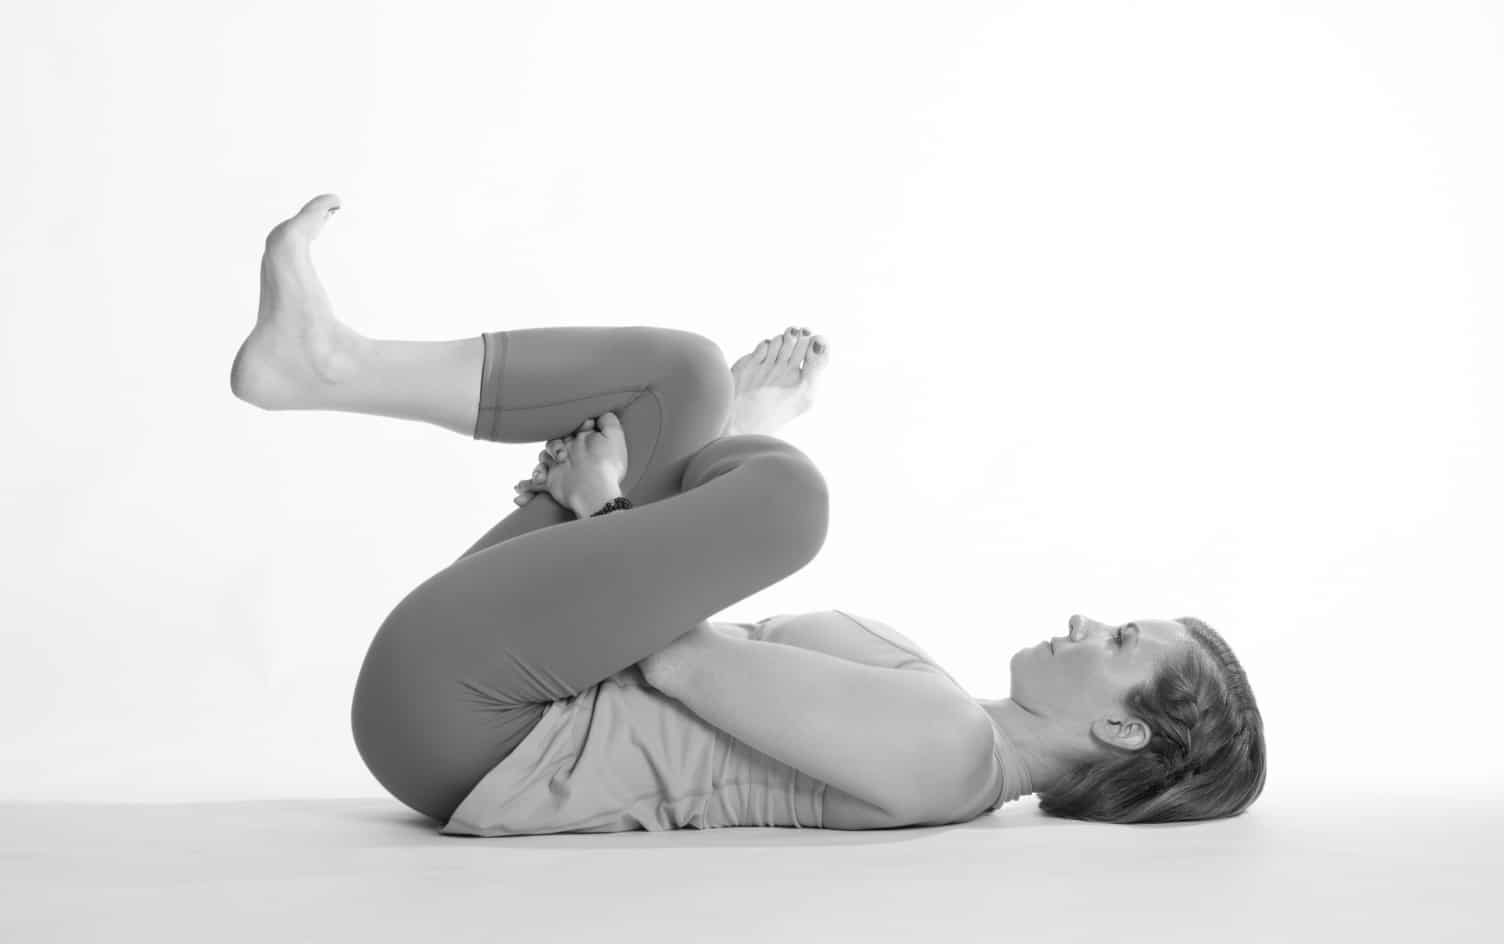
Pigeon opens up the hips, groin, hip flexors and thighs, which makes it a great remedy for much of modern-day life, but it can be a challenging posture for beginners, so start with a seated version known as a figure four stretch.
The move: Sit with your legs extended in front of you. Cross your right ankle over your left thigh, just above your knee. Slowly, bend your left knee and walk your left foot closer to your butt. Flex your right foot and gently press your right thigh open. Hold for 5–10 breaths and switch sides.
11. SAVASANA
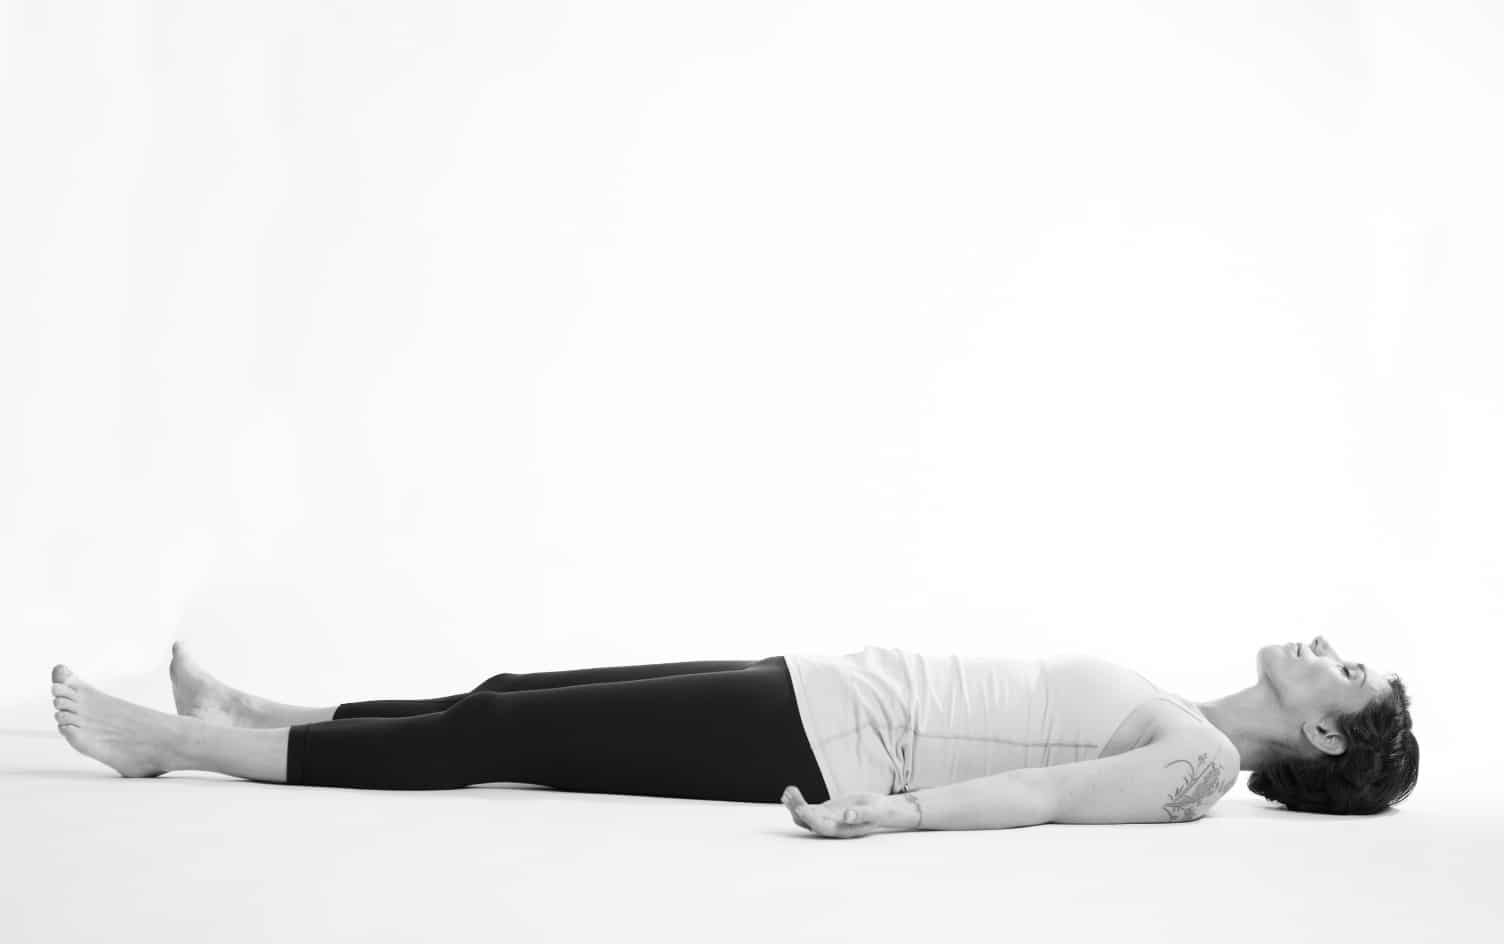
Sure, lying down at the end of a tough class can feel like sweet relief. Then, the mind kicks in wondering what’s for dinner, thinking about that email that needs responding to and planning for the next thing on your to-do list. That sweet relief evaporates and you’re tempted to roll up your mat and slip out the door. Don’t do it.
There’s a reason you’ll always find final relaxation pose or savasana waiting for you at the end of class. It is the most important posture in your practice.
Yes, it relaxes the nervous system, calms the mind and reduces insomnia, headaches and fatigue, but its most important function is to allow us to absorb our practice. Just as a good night sleep repairs and rejuvenates us from the day, final relaxation pose gives our body time to acknowledge the practice and reset the entire mind and body.
The move: To come into the pose, simply lie down on your back. Lengthen the legs and take them a little wider than the hips. Let the feet flop open. Lift and lengthen one arm and then the other, resting each by your side, palms facing up. Don’t be afraid to take up room. Close your eyes and rest here 5–15 minutes.
When you’re ready to come out of the pose, do so slowly. Wiggle your fingers and toes. Circle your wrists and ankles. Maybe hug your knees into your chest. Roll over to your right side, resting in the fetal position for a moment, and then press up to a seated position.
