We live in the golden age of multitasking. Just look at your smartphone. With a single device, you can make phone calls, take pictures, make dinner reservations and even start your car.
What if we told you there was an exercise that was as versatile as your phone? There is, and it’s called the Turkish get up.
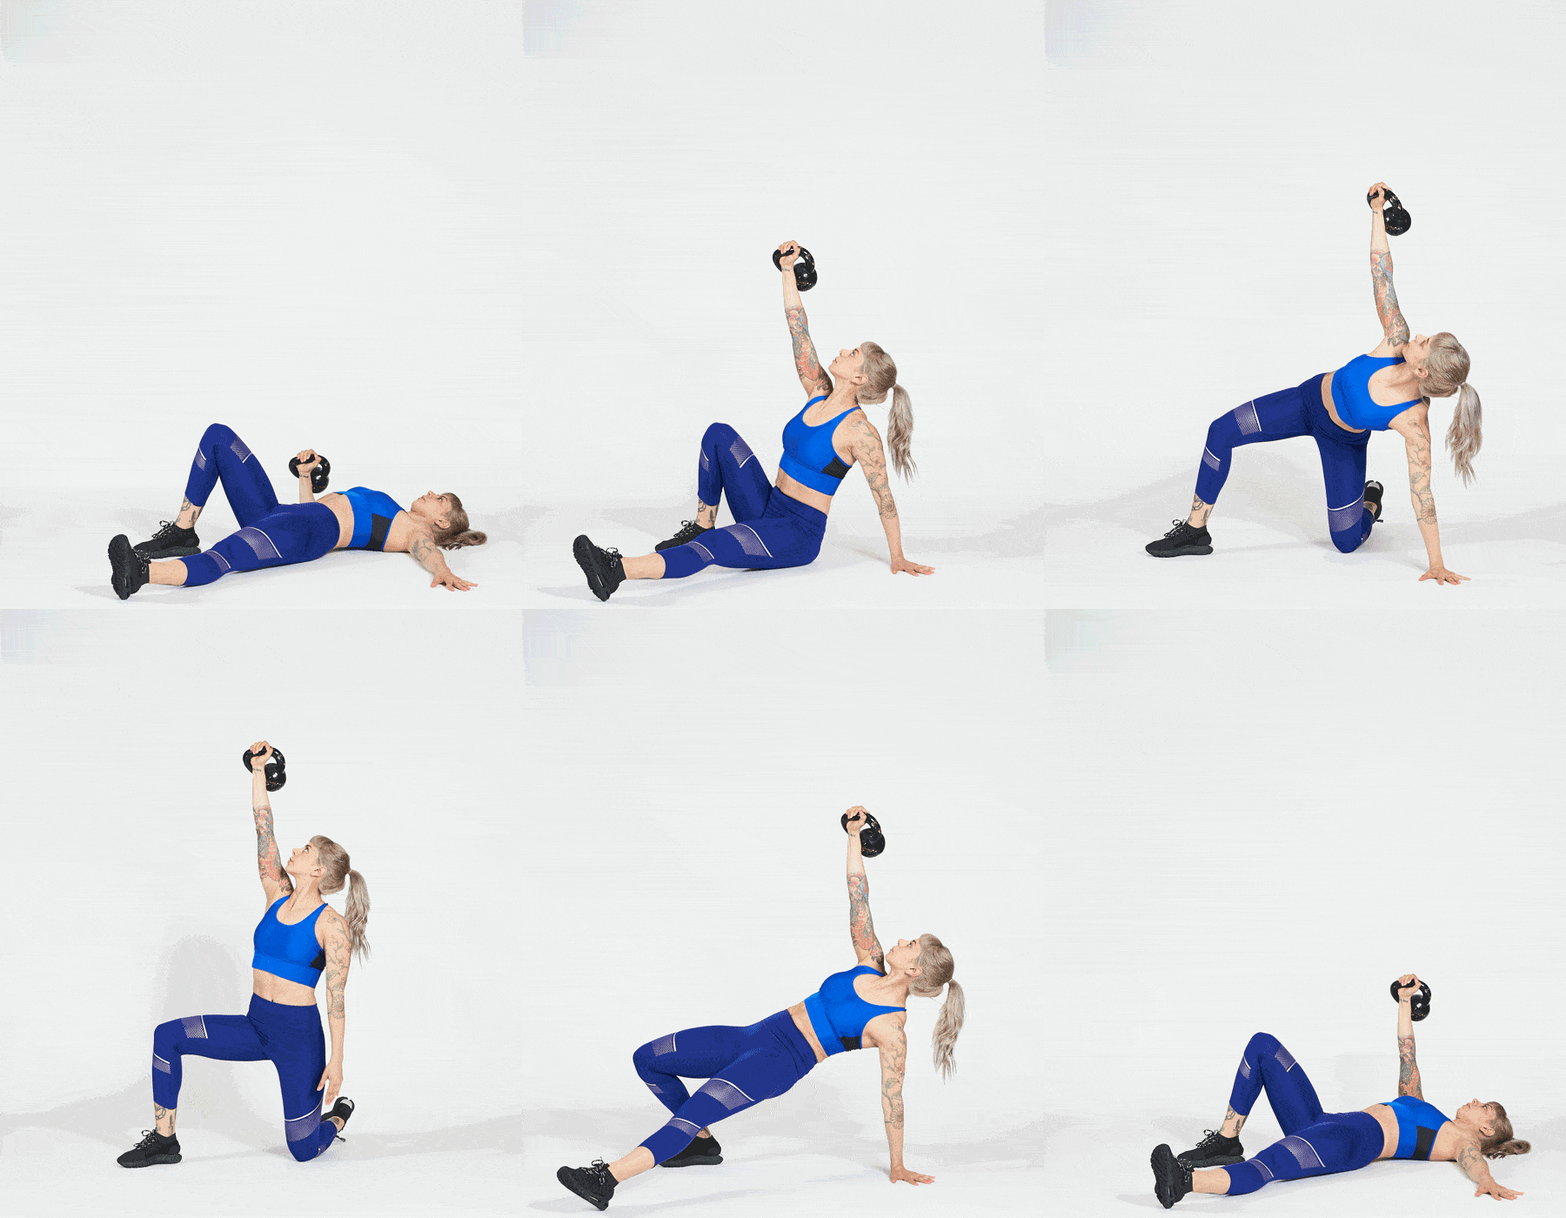
A favorite of old-time strongmen and wrestlers, Turkish get ups combine seven movements as you go from a lying position to standing and back down again.
What makes TGUs so special? The primitive movements that make up the TGU mimic the natural process by which we learn to move as babies. We start by learning to roll from the fetal position, then crawl, then stand before finally walking. This natural sequence runs the gamut of human movement to train tons of positions and muscles in minimal time.
So if you’re looking to build strength, mobility and coordination, master these seven steps:
THE TURKISH GET UP: STEP-BY-STEP

Note: We’ll assume you’re starting with your right side, for ease of explanation. If you’re new to TGUs, start with no weight. Eventually, you can add a light item such as a water bottle before progressing to a kettlebell or dumbbell.

- Lay on your right side in the fetal position, grabbing the weight with a hand-over-hand grip (even if you’re not using any weight). Squeeze your hands as tight as you can and maintain this tension throughout the entire movement.
- Roll to your left until you’re flat on your back, keeping both hands close to your right hip.
- Bend your right knee and place your right foot flat on the ground and straighten your left leg so it’s slightly outside your hip.
- Let go of the weight with your left hand and press your right hand straight up as if doing a bench press. Keep your wrist as straight as possible through all seven steps. Imagine you were arm wrestling and you refuse to lose.

- Place your left arm out to the side and flat on the ground, mimicking the angle of your left leg. They should be at about 45 degrees relative to your torso.
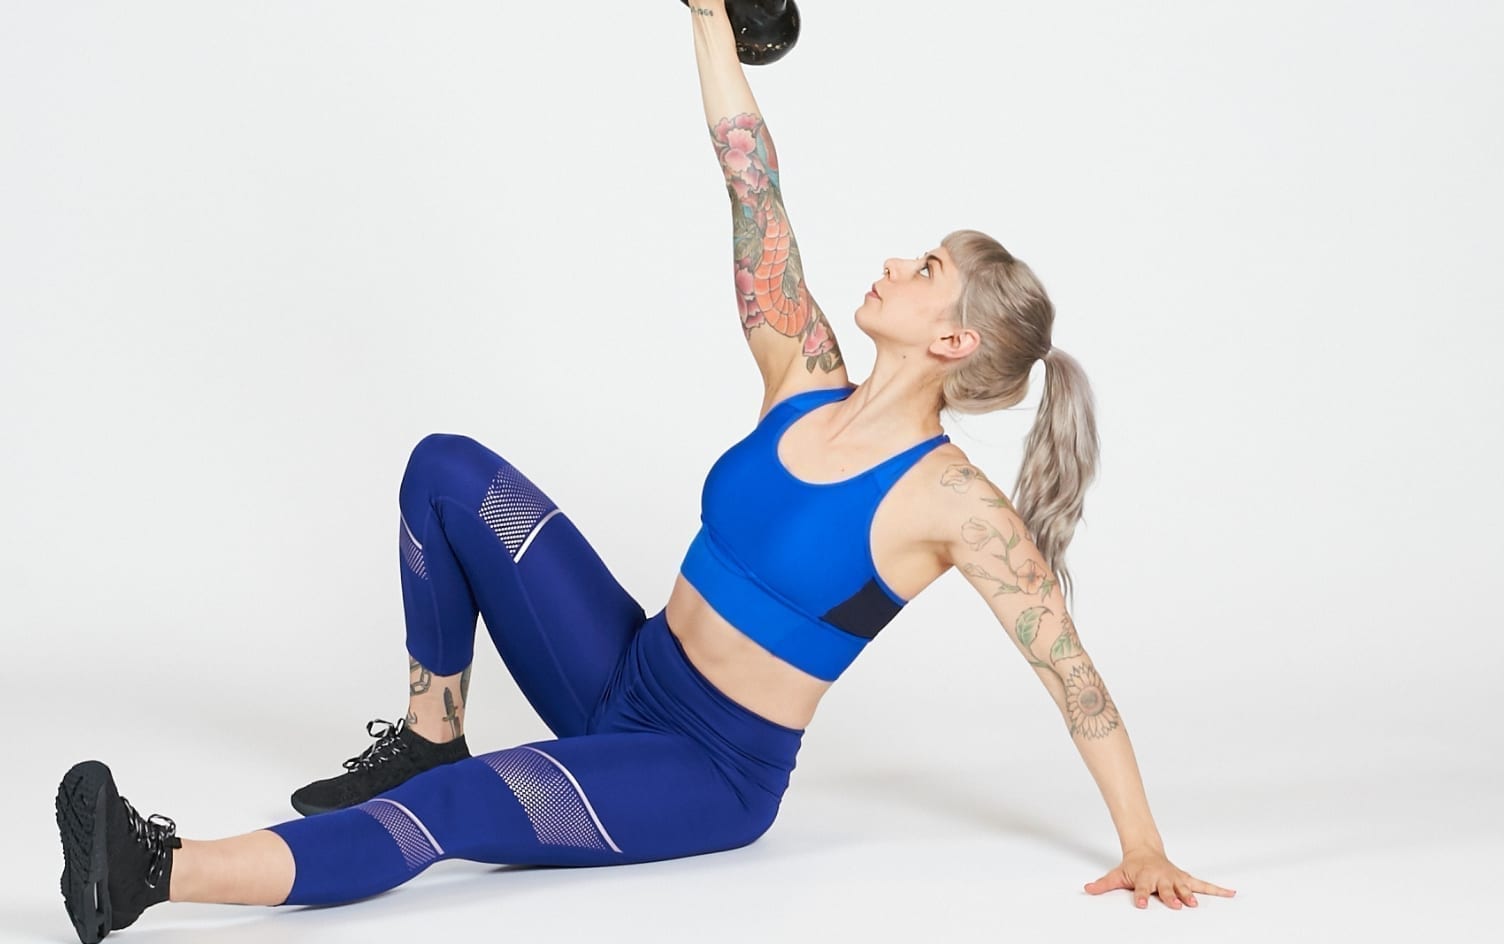
- Push down into the ground with your left hand and heel, and roll your body to your left until you’re propped up on your left elbow. Remember, it’s a rolling motion, not a situp.
- Keep your chest tall and your left shoulder pulled back. Imagine someone was trying to tickle your left armpit — don’t let them!
- Keep your eyes up and looking at your right hand. Your eyes will stay fixed on your right hand until you get to step 6.

- Push down into the ground with your left hand to straighten your left arm.
- Keeping your chest tall, reposition your left arm slightly behind you if need be.

- Keeping your right knee bent and left leg straight, lift your hips up as high as you can, creating a bridge position.
- At this point, both arms should be straight and directly on top of each other.
- If you can’t draw a straight line down from your right hand to your left hand, return to step 3 and reposition your left hand.

- Sweep your left leg back underneath you and place your left knee and left toes on the ground.
- If you’re uncomfortable letting your left leg leave the floor entirely, you can gently drag your left foot along the ground until it gets back underneath you.

- Sit back into your left hip slightly so your butt is directly over your left heel.
- Gently let go of the ground with your left hand and bring your torso into an upright position.
- Swivel both legs until you’re in a lunge or split-squat position (this is called “half-kneeling.”)
- Look straight ahead instead of up at your right hand.

- Dig your left toes into the floor and push down into the ground with your right foot to stand up.
- Bring your feet together and stand tall.
Reverse your steps to return to the starting position. This may seem daunting, but keep the steps simple and take it slow. To summarize the downward portion:
- Do a reverse lunge.
- Swivel to the half-kneeling position.
- Find the floor with your left hand (and look up at your right hand).
- Sweep your left leg through into the hip-thrust position.
- Put your butt on the ground.
- Put your left elbow on the ground.
- Lay down.
SETS AND REPS
The TGU can be used as a full-blown strengthening exercise or as a quick full-body warmup. Either way, the steps should be slow and deliberate, paying careful attention to each position. That said, we’re not trying to max out with heavy weight or get a burning muscle pump. TGUs are best done for sets of 1–3 reps per side, using a weight you can handle smoothly from step to step.
TIPS AND TRICKS
TGUs take lots of physical and mental fortitude. If you feel like you’re playing checkers at a chess tournament and you’re not quite ready for full TGUs yet, try these tricks:
1. HALF GET-UPS
TGU novices can use just the first three steps to get acquainted with rolling and bridging. Once you’ve bridged your hips in the air, simply reverse the steps back to the floor and repeat. Because you’re doing fewer steps, aim for 5–10 reps per side instead of the typical 1–3 reps.
2. BALANCE THE SHOE
If you’re struggling to make the steps flow smoothly or you’re not quite ready to add weight, try doing your TGUs with a shoe balanced on your clenched fist. You’ll have to slow way down and concentrate on each individual movement to keep the shoe from falling.


