I have always had the dream of canning things—pickling fruits and veggies, making jams, and jellies. Year after year, I say I’ll do it, but I never seem to get around to it—until this year! The abundance of delicious fruits and veggies at my local farmers’ market finally pushed me over the edge and inspired me to get creative.
I decided to start with pickling because, honestly, it just seemed like the easiest place to begin. I wanted to pickle two things, one sweet and one savory, so I went with pickled red onions and peaches. (If you’ve read any of my other posts, you know I have an ongoing love affair with peaches: Skinny Peach Pie Popsicles, Peaches & Cream Chia Seed Pudding, Peach Bubbler Mocktail.)
There are lots of different ways to pickle—some involve fermenting, and curing, which can take a long time. The method I use is quick—the pickled ingredients are ready in a few hours, and last up to a week in the fridge! Here’s the step-by-step.
1. Pick fresh produce Always use fruits and veggies that are ripe, yet still firm and crisp. Vinegar doesn’t have the magic ability to turn a mushy cucumber into a crunchy delicacy!
2. Sterilize the jars The first think you must know about canning is that all jars need to be sterilized, so anything you plan to put food in must be boiled. They do sell special canning tongs to remove the jars from the boiling water, but you can use regular ones, too. I found rubber coated tongs work especially well to grip a wet mason jar. (Tip: Be sure to submerge the lower half of your tongs in the boiling water for few minutes. Because it doesn’t do you much good to grab a sterile jar with dirty tongs!)
3. Dry your equipment Once you’ve allowed the jars to sit in the boiling water, remove them, and let them drain on a clean surface. Using this quick method, the jars do not need to be boiling hot when the ingredients are added. (Not to be confused with the process of making jams, in which you have to put the hot jam in a hot jar, seal it, and then boil.)
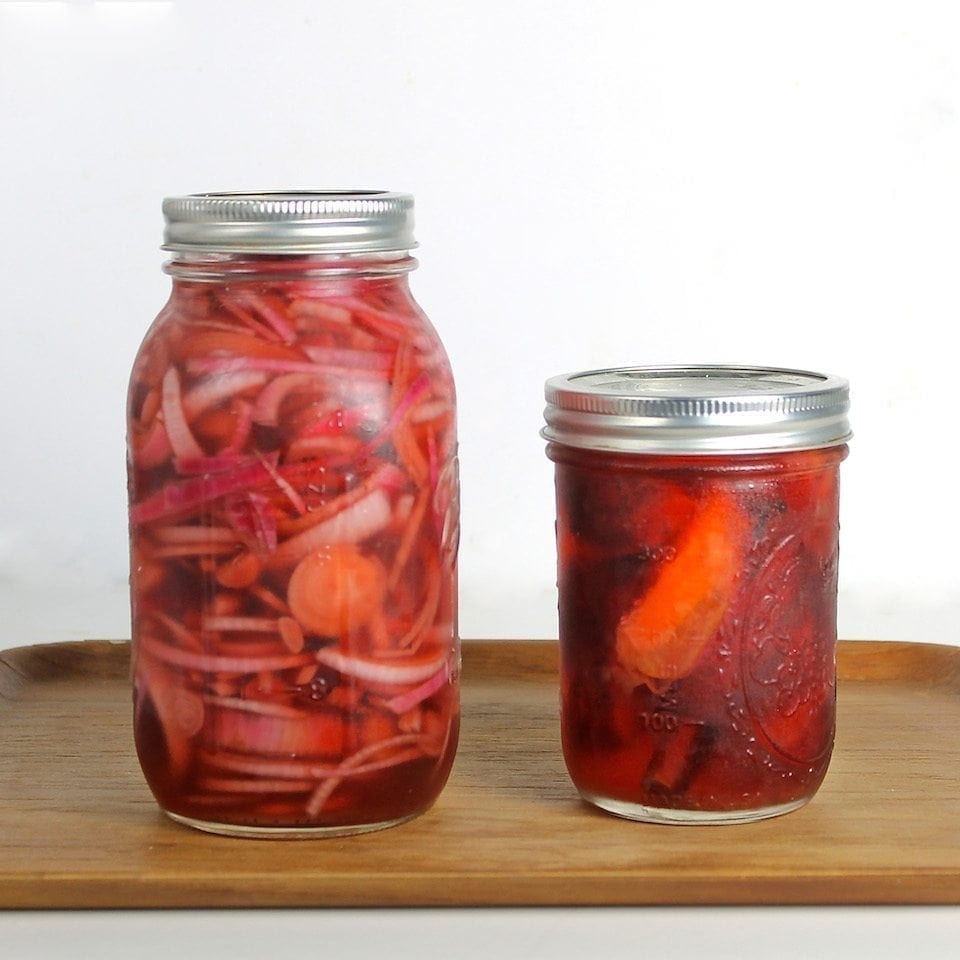
4. Add your fillings The great thing about pickling is that you can make the process as simple or as involved as you’d like. I love the delicious bite and sweetness that pickled red onions give to sandwiches, so I wanted mine to be to uncomplicated. To let the red onion shine, I thinly sliced the onion, sautéed it, and then filled a cooled mason jar up with the slices. I then added 50% red wine vinegar, 50% white vinegar, and a teaspoon of pickling salt (pure salt) to fill in the empty spaces.
I decided to do something more unusual with the peaches, so I blanched them, and then filled the jar with peach quarters. I added a pinch of cloves, and two cinnamon sticks, and then filled the jar with 75% white vinegar and 25% rice wine vinegar. What am I going to do with pickled peaches? (It doesn’t sound like something you’d want to take a bite out of, does it?) Peaches, and other pickled fruits, are perfect for making unusual homemade relishes!
I’ve been putting pickled red onions on my sandwiches, wraps, and salads this past week, and I have a special dinner planned for the peach relish—yum!
Think you’ll try your hand at pickling? What are you planning to put in a jar? Share in the comments below!